Author: autojackhaoAdmin

  • Avoiding Distracted Driving: Strategies for Focused Driving

    Avoiding Distracted Driving: Strategies for Focused Driving

    Distracted driving remains one of the leading causes of accidents on U.S. roads. By adopting proven distracted driving tips and building safe driving habits, you can significantly reduce your risk behind the wheel. In this article, we’ll explore the most common sources of distraction, practical strategies to avoid phone while driving, and techniques to maintain focus from start to finish.

    1. Understand the Risks of Distracted Driving

    Distractions come in three main categories:

    • Visual: Taking your eyes off the road (e.g., glancing at your phone, adjusting the GPS).
    • Manual: Removing your hands from the steering wheel (e.g., eating, reaching for items).
    • Cognitive: Diverting your mind from driving (e.g., daydreaming, emotional conversations).

    Even a five‑second glance at your phone at 55 mph covers the length of a football field without you looking at the road. Understanding these dangers is the first step in adopting effective distracted driving tips.

    2. Implement a “Phone-Free” Driving Zone

    Out of Reach, Out of Mind

    Place your phone where you can’t easily grab it—such as the glove box, purse in the back seat, or a center console drawer. This simple step removes the temptation to check notifications or send quick replies.

    Use “Do Not Disturb” Modes

    Most smartphones offer a driving mode that silences alerts and sends an auto-reply to incoming texts. Activate this feature before you start the engine to avoid phone while driving distractions completely.

    3. Plan Ahead to Minimize In-Car Distractions

    Preparation prevents many common diversions:

    • Set Navigation & Music: Program your GPS and select your playlist or podcast before pulling out of the driveway.
    • Secure Loose Items: Stow water bottles, snacks, and other items securely so they don’t roll or fall mid‑drive.
    • Adjust Climate Controls: Set temperature, fan speed, and seat positions while parked.

    4. Adopt Mindful Driving Techniques

    Practice the “Eyes Forward” Rule

    Keep your focus on the road ahead, scanning lanes, mirrors, and your speedometer frequently. Shifting your gaze every two seconds helps anticipate hazards before they become emergencies.

    Engage in Calm, Focused Driving

    Listen to instrumental music or calm radio stations to reduce cognitive load. Avoid heated conversations or emotionally charged phone calls even if you’re parked—stress carries over into your driving mindset.

    5. Leverage Technology Wisely

    When used correctly, technology can enhance safety:

    • Hands-Free Calling: Pair your phone via Bluetooth and use voice commands to make calls without touching your device.
    • Lane‑Keep & Collision Warnings: Enable driver‑assistance features that alert you to drifting lanes or close obstacles.
    • Dash Mounts: Use a secure phone mount at eye level for navigation—only glance when absolutely necessary.

    6. Cultivate Long-Term Safe Driving Habits

    Consistent practice turns good strategies into automatic behaviors:

    • Review & Reflect: After each drive, note any moments where you felt distracted and plan improvements.
    • Set Personal Rules: Commit to never using your phone for anything other than emergencies while driving.
    • Lead by Example: Encourage family and friends to follow your safe driving habits—peer influence can reinforce positive change.

    Conclusion

    Maintaining focus on the road is essential for everyone’s safety. By following these distracted driving tips, consciously choosing to avoid phone while driving, and embedding safe driving habits into your routine, you’ll protect yourself, your passengers, and other road users. Remember: the moment your full attention shifts away from driving, the likelihood of an accident rises—stay present, stay safe, and make every journey a priority.

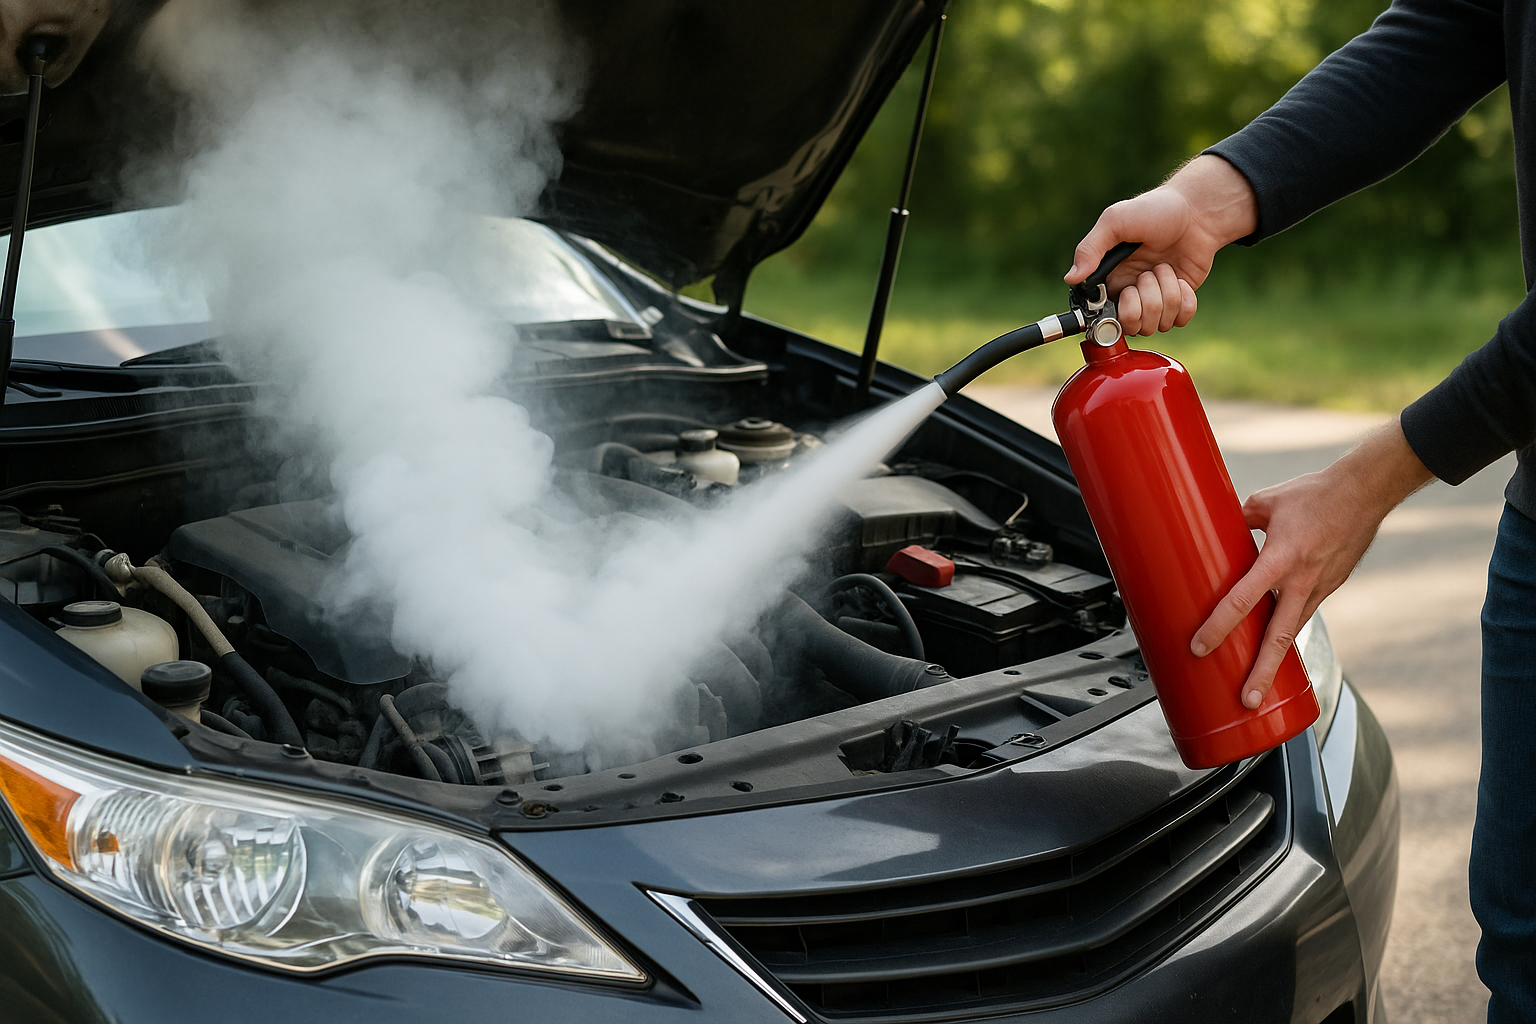
  • Preventing and Responding to Car Fires: Safety Measures

    Preventing and Responding to Car Fires: Safety Measures

    Car fires, though relatively rare, can be devastating and dangerous if not prevented or handled correctly. By understanding car fire prevention strategies and following proper vehicle fire safety protocols, you can reduce the risk of fire and react swiftly in an emergency. This guide covers maintenance tips, warning signs, and emergency response steps to keep you and your passengers safe.

    1. Key Causes of Vehicle Fires

    Understanding what typically ignites a car fire is the first step toward prevention:

    • Mechanical Failures: Leaking fuel or oil onto hot engine components.
    • Electrical Shorts: Damaged wiring, faulty alternators, or loose battery connections.
    • Overheating Catalytic Converters: Running rich fuel mixtures can overheat the exhaust system.
    • Aftermarket Modifications: Improperly installed performance upgrades or audio systems.

    2. Car Fire Prevention Tips

    Adopt these car fire prevention measures as part of your routine maintenance:

    2.1 Regular Inspections

    • Check for fuel or oil leaks under the hood and chassis.
    • Inspect hoses and belts for cracks or wear that could lead to fluid spray.
    • Have your cooling system serviced to avoid overheating.

    2.2 Electrical System Care

    • Ensure battery terminals are clean, tight, and free of corrosion.
    • Verify that all aftermarket wiring is routed away from heat sources and secured properly.
    • Replace frayed or exposed wires immediately to prevent shorts.

    2.3 Safe Fuel Handling

    • Avoid carrying extra fuel containers in passenger compartments.
    • Refuel with the engine off and avoid overfilling to minimize spills.
    • Store spare gasoline only in approved, sealed containers outside the passenger area.

    2.4 Mindful Modifications

    • Use professional installers for performance parts and electrical upgrades.
    • Choose components rated for automotive use and appropriate amperage.
    • Verify that exhaust and turbo systems have adequate heat shielding.

    3. Recognizing Warning Signs

    Early detection is critical for vehicle fire safety:

    • Burning Smells: Chemical or rubber odors may indicate overheating or melting insulation.
    • Smoke: White smoke from the engine bay or dark smoke near the exhaust.
    • Warning Lights: Battery, oil pressure, or temperature lights illuminated on the dashboard.
    • Unusual Noises: Hissing (leaks), popping (electrical arcing), or ticking (fluid hitting hot parts).

    4. Emergency Response Steps

    If you suspect your vehicle is on fire, follow these emergency response steps immediately:

    4.1 Pull Over Safely

    1. Activate your hazard lights and slow down gradually.
    2. Pull off the road to a clear, level area away from traffic and structures.
    3. Turn off the engine and engage the parking brake.

    4.2 Evacuate Passengers

    • Instruct everyone to exit the vehicle on the side away from traffic.
    • Move at least 100 feet away and stay upwind to avoid smoke inhalation.
    • Do not attempt to retrieve personal belongings.

    4.3 Call for Help

    • Dial 911 immediately and provide your location, vehicle description, and fire size.
    • Alert highway patrol or emergency services if you are on a major road or highway.

    4.4 Use a Fire Extinguisher (If Safe)

    • Only use a Class B/C (dry chemical) extinguisher rated for flammable liquids and electrical fires.
    • Maintain a safe distance (6–10 feet) and aim at the fire’s base.
    • Discharge in short bursts and back away if the fire intensifies.

    5. After the Incident

    Once the fire is out and professionals have cleared the scene:

    • Have your vehicle towed to a qualified repair facility for a full inspection.
    • Document damage for insurance and replacement purposes.
    • Review what triggered the fire to prevent future incidents.

    Conclusion

    Effective car fire prevention relies on proactive maintenance and awareness of potential hazards. By following these guidelines for vehicle fire safety and knowing the proper emergency response steps, you can protect yourself, your passengers, and your investment from the dangers of automotive fires.

  • Overview of Federal and State Vehicle Inspection Requirements

    Overview of Federal and State Vehicle Inspection Requirements

    Keeping your car in safe, roadworthy condition often means complying with vehicle inspection mandates at both the federal and state level. While there is no single nationwide inspection program, many states enforce periodic emissions and safety checks to reduce pollution and prevent mechanical failures. This guide will explain the basics of state inspection laws, highlight common safety inspection items, and offer tips on staying compliant regardless of where you live.

    1. Federal vs. State Roles

    The federal government, through the Environmental Protection Agency (EPA) and the National Highway Traffic Safety Administration (NHTSA), sets broad standards but does not inspect every vehicle. Instead:

    • EPA Emissions Standards: Require manufacturers to certify that new vehicles meet emissions limits (Tier 2, Tier 3).
    • NHTSA Safety Standards: Mandate design and equipment criteria (seat belts, airbags, lighting).
    • Individual states implement inspection programs to verify ongoing compliance in used vehicles.

    2. Types of State Inspection Programs

    Most states fall into one of three categories:

    2.1 Safety-Only Inspections

    States like Texas and Virginia require annual or biennial checks of brakes, steering, tires, lights, windshield wipers, horn, and other components to ensure safe operation.

    2.2 Emissions-Only Inspections

    Regions with air-quality concerns (e.g., California’s Bay Area, New York City, and parts of Colorado) mandate periodic tailpipe and OBD-II tests to verify compliance with state emissions limits.

    2.3 Combined Safety & Emissions Inspections

    In states such as Pennsylvania and Illinois, vehicles must pass both safety and emissions tests—often at the same station—typically once per year.

    3. Common Safety Inspection Items

    Although requirements vary, most safety inspections include:

    • Brake System: Pad thickness, rotor condition, parking brake function.
    • Steering & Suspension: Play in steering components, shocks/struts, tie rods.
    • Lights & Signals: Headlights, turn signals, brake lights, reverse lights.
    • Tires & Wheels: Tread depth (minimum 2/32″), sidewall damage, lug nut torque.
    • Windshield & Wipers: Cracks in driver’s view, wiper operation, fluid reservoir.
    • Horn & Mirrors: Functionality and correct placement of side and rearview mirrors.

    4. Common Emissions Inspection Items

    Emissions tests may include:

    • OBD-II Scan: Checks for stored diagnostic trouble codes related to emissions control components.
    • Tailpipe Test: Measures concentrations of hydrocarbons (HC), carbon monoxide (CO), and NOₓ at idle and, in some states, under simulated driving conditions.
    • Visual Inspection: Verifies the presence and condition of catalytic converters, gas caps, and EVAP system components.

    5. Who Must Get Inspected and When

    Inspection frequency and covered vehicles depend on state law:

    • New Vehicles: Exempt for the first one to two years in most states.
    • Passenger Cars & Light Trucks: Typically annual or biennial inspections, though some low-usage or antique vehicles may be exempt.
    • Diesel & Heavy-Duty Vehicles: Often subject to stricter emissions standards and more frequent checks.

    6. Penalties for Non-Compliance

    Failing to obtain a required inspection can lead to:

    • Fines or citations when registering your vehicle or during a traffic stop.
    • Registration renewal holds or denial of plates.
    • Potential safety hazards if defects go uncorrected.

    7. Tips for a Smooth Inspection

    • Pre-Check at Home: Inspect lights, fluids, and tire tread before heading to the station.
    • Service Before Testing: Address worn brakes, faulty sensors, and dead bulbs early.
    • Find Certified Stations: Use state DMV resources to locate authorized testers.
    • Keep Records: Retain inspection certificates to prove compliance during renewals or resale.

    Conclusion

    Understanding your state’s vehicle inspection requirements—from state inspection laws to the specifics of safety inspection and emissions testing—helps you stay legal and safe on the road. By knowing what to expect, preparing your car in advance, and following up on any required repairs, you can breeze through inspections and keep your vehicle in top condition year after year.

  • How to Negotiate the Best Price at the Dealership

    How to Negotiate the Best Price at the Dealership

    Walking into a dealership can be intimidating, but with the right approach and research, you can negotiate car price like a pro and drive away with one of the best car deals available. This dealership negotiation guide will walk you through every step—from preparation to closing—so you’ll feel confident and in control at the bargaining table.

    1. Do Your Homework Before You Go

    Successful negotiate car price strategies start long before you set foot on the lot. Make these preparations:

    • Identify Your Target Models: Compare trims, features, and options online to narrow your choices.
    • Check Market Values: Use tools like Kelley Blue Book or Edmunds to find average transaction prices in your ZIP code.
    • Look for Incentives: Search for manufacturer rebates, dealer cash, loyalty bonuses, or special financing offers.
    • Get Pre-Approved for Financing: Secure a loan rate from your bank or credit union to set your maximum budget and strengthen your leverage.

    2. Establish Your Budget and Walk-Away Price

    Before engaging in dealership negotiation, determine:

    • Total Purchase Price: Focus on the out-the-door number (including fees, taxes, and add-ons), not just the monthly payment.
    • Trade-In Value: Research your current vehicle’s trade-in worth and decide if you’ll use it as leverage.
    • Walk-Away Price: Identify the highest price you’re willing to pay. If the dealer can’t match or beat it, be prepared to leave.

    3. Time Your Visit for Maximum Leverage

    Timing can impact the best car deals you receive:

    • End of the Month/Quarter: Sales staff race to hit quotas and may offer deeper discounts.
    • Model Year Changeover: When new models arrive, dealers discount outgoing inventory.
    • Weekdays and Rainy Days: Foot traffic is lower, and salespeople may be more motivated to negotiate.

    4. Master the Art of In-Person Negotiation

    At the dealership, follow these dealership negotiation tactics:

    4.1 Start with the Dealer’s Invoice Price

    Ask the salesperson for the dealer invoice or “wholesale” price. Aim to negotiate a few hundred dollars above that invoice rather than the MSRP (sticker price).

    4.2 Make a Reasonable First Offer

    Begin negotiations at 3–5% below the invoice price. This gives you room to concede toward your walk-away price without feeling pressured.

    4.3 Negotiate One Thing at a Time

    • Price First: Settle on the purchase price before discussing trade-in or financing.
    • Trade-In Separately: Negotiate trade-in value only after the new car price is finalized.
    • Financing Last: Compare dealer financing only if it beats your pre-approved rate.

    4.4 Use Silence and Patience

    After making an offer, stay quiet. Silence often prompts the salesperson to improve the deal rather than withstand pressure.

    5. Leverage Competing Quotes and Walk-Away Power

    Strengthen your position by:

    • Getting Multiple Quotes: Request prices from several dealers and play them against each other.
    • Being Ready to Walk Away: Politely end negotiations if your target price isn’t met. Often, a “last-chance” improved offer follows.

    6. Seal the Deal Smartly

    Once you’ve agreed on a price, ensure no unwanted extras sneak in:

    • Review the Sales Contract: Confirm the negotiated figure matches the contract’s out-the-door price.
    • Avoid Add-On Pressure: Decline extended warranties, paint protection, or gap insurance unless you’ve pre-researched their value.
    • Check for Dealer Fees: Question any high “doc” or “preparation” fees and request reductions if they seem excessive.

    Conclusion

    With this dealership negotiation framework—backed by thorough research, clear budget limits, strategic timing, and confident in-person tactics—you’ll be well-equipped to negotiate car price effectively and secure one of the best car deals on the lot. Remember: preparation and persistence are your greatest assets. Happy negotiating!

  • How to Safely Change a Flat Tire on the Road

    How to Safely Change a Flat Tire on the Road

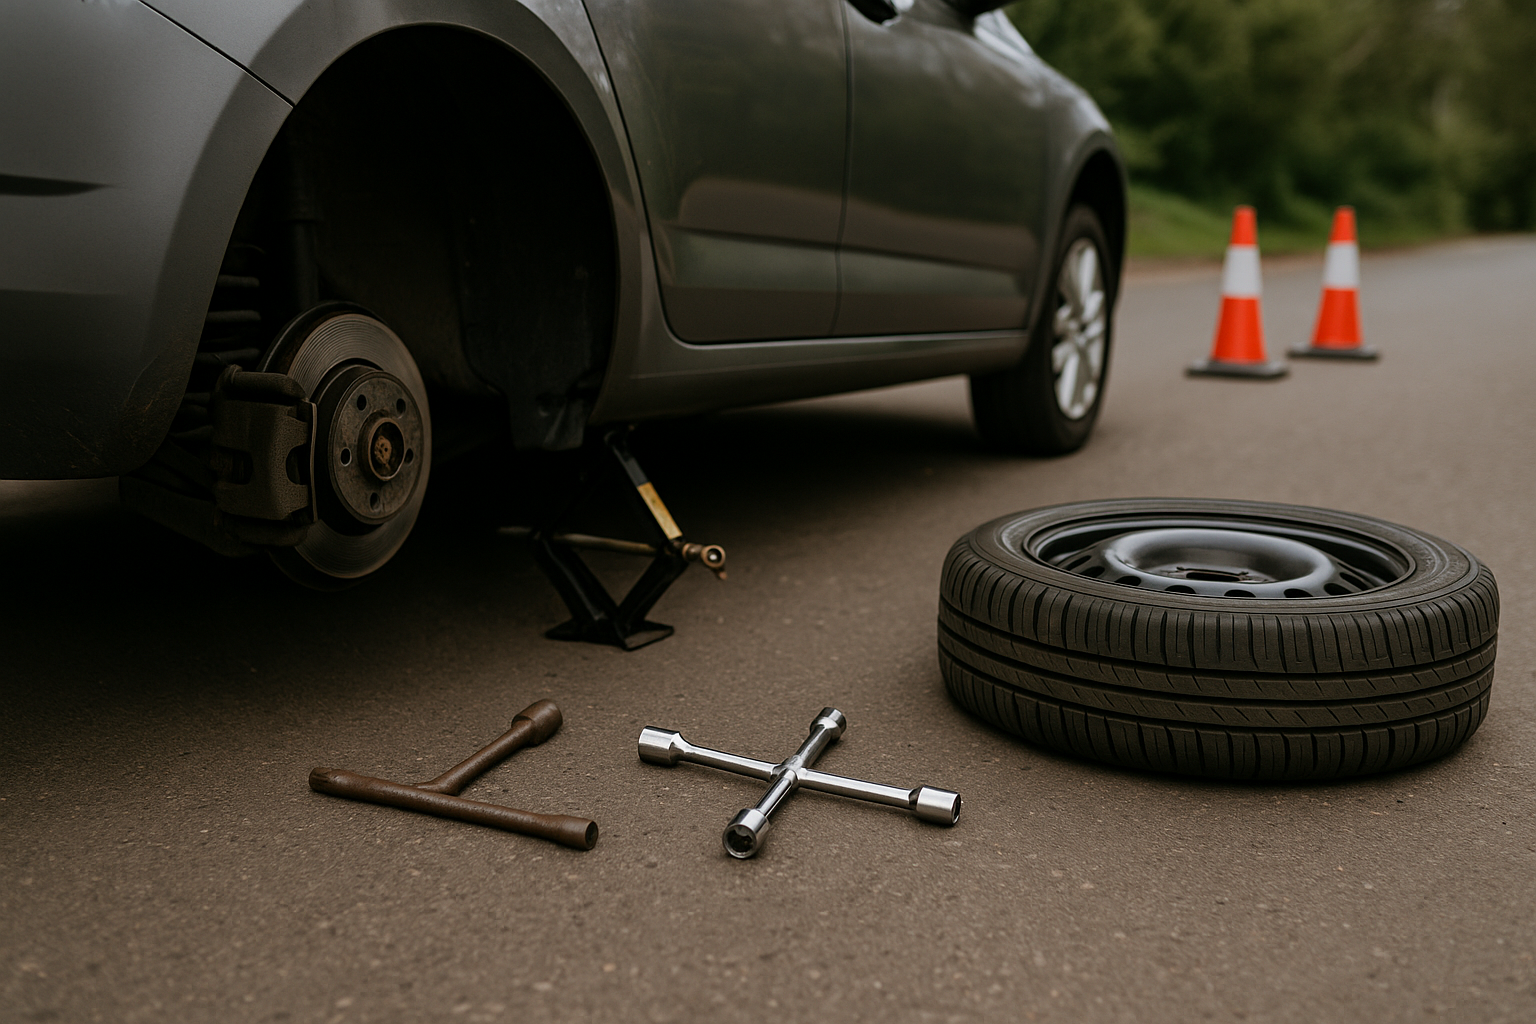
    A sudden flat tire can turn a routine drive into a stressful situation. With the right precautions and a clear roadside tire change plan, you can perform a safe and efficient flat tire safety procedure. Follow this step‑by‑step change flat tire guide to get back on the road with confidence.

    1. Prepare Before You Stop

    When you realize you have a flat:

    • Don’t slam on the brakes: Gradually slow down to maintain control.
    • Turn on hazard lights: Alert other drivers that you’re slowing or stopping.
    • Signal your intentions: Use your turn signal to indicate you’re exiting the travel lane.

    2. Move to a Safe Location

    Choose the safest spot possible:

    1. Find level ground: Look for a wide shoulder, parking lot, or side street.
    2. Avoid curves and hills: Other drivers need clear sightlines to see your stopped vehicle.
    3. Engage the parking brake: Prevent your car from rolling once it’s jacked up.

    3. Gather Your Tools & Gear

    Before letting anyone out of the car, assemble what you need:

    • Jack and lug wrench (usually stowed under the trunk floor)
    • Spare tire (check pressure regularly)
    • Wheel wedges or large rocks to block the wheels
    • Reflective vest and warning triangle or cones
    • Flashlight (if it’s dark) and gloves

    4. Secure the Vehicle

    Safety first:

    • Place wheel wedges: Wedge them behind or in front of tires opposite the flat.
    • Loosen lug nuts slightly: Turn the lug wrench counterclockwise while the wheel is on the ground. Do not remove them completely.

    5. Jack Up the Car

    Proper placement and jacking technique are critical:

    • Locate the jack point: Refer to your owner’s manual—typically on the frame behind the flat tire.
    • Raise the vehicle: Pump the jack until the flat tire is about 6 inches off the ground.
    • Ensure stability: The jack should stand straight and firm on level ground.

    6. Remove the Flat & Install the Spare

    Swap quickly but carefully:

    1. Unscrew lug nuts: Remove them entirely and store in a safe spot.
    2. Remove the flat tire: Grip it by the treads and pull it straight off the hub.
    3. Mount the spare: Line up the bolt holes and slide it onto the hub.
    4. Finger‑tighten lug nuts: Replace nuts and tighten by hand to secure the spare.

    7. Lower the Car & Tighten Lug Nuts

    Finalize the installation:

    • Lower the jack: Slowly bring the car back to the ground.
    • Tighten lug nuts: Use the lug wrench in a star pattern to ensure even torque. Tighten firmly.
    • Store tools and flat tire: Place them back in your trunk or storage area.

    8. After the Change: Check & Drive Safely

    Before resuming normal driving:

    • Inspect spare tire pressure: If you have a gauge, confirm it’s at least 30 psi.
    • Stow warning devices: Remove triangles and vests once you’re back in the lane.
    • Drive cautiously: Most spares are temporary “donuts” limited to 50 mph and 50 miles. Head to a repair shop promptly.

    Conclusion

    With these flat tire safety steps, you can confidently handle a roadside tire change and get back on your journey. Regularly check your spare’s condition and practice these steps at home so, in an emergency, you’re prepared to change a flat tire quickly, safely, and effectively.

  • What to Do When Your Car Breaks Down on the Highway

    What to Do When Your Car Breaks Down on the Highway

    A highway breakdown can be stressful and even dangerous if you’re not prepared. This highway breakdown guide will walk you through the essential emergency procedures and roadside safety steps to take—from the moment you notice something is wrong to when help arrives.

    1. Recognize the Signs of Imminent Breakdown

    Pay attention to warning indicators that your car may be about to fail:

    • Warning lights: Check‑engine, oil pressure, or temperature lights illuminated on the dash.
    • Unusual noises: Grinding, screeching, or knocking coming from the engine or wheels.
    • Loss of power or responsiveness: Engine hesitation, stalling, or sudden drop in performance.
    • Fluid leaks: Puddles of oil, coolant, or transmission fluid under the car.

    2. Move to a Safe Location

    When you sense a problem, follow these roadside safety steps:

    1. Signal early: Use your turn signal and hazard lights as you slow down.
    2. Steer to the right: Guide your vehicle toward the shoulder or emergency lane.
    3. Aim for a flat, firm spot: Avoid soft shoulders, steep slopes, or curves where visibility is limited.
    4. Park and secure: Engage the parking brake, put the car in “Park” (or first gear for manuals), and turn off the engine.

    3. Warn Other Drivers

    Make yourself and your vehicle visible:

    • Turn on your hazard lights immediately.
    • Place reflective warning triangles or flares at least 10–20 feet behind your car.
    • If you have a high‑visibility vest, put it on before exiting the vehicle.

    4. Stay Safely Away from Traffic

    Once you’ve secured your car:

    • Exit the vehicle on the passenger side to avoid oncoming traffic.
    • Move everyone to a safe spot behind guardrails or a barrier, if available.
    • Keep children and pets close and under control.

    5. Assess the Problem (If Safe to Do So)

    If you’re comfortable and the situation allows, perform a quick check:

    • Look under the hood for obvious issues—loose belts, low fluid levels, or disconnected hoses.
    • Check tire pressure and condition if you suspect a flat or blowout.
    • Listen for fuel pump or starter motor activity when you turn the key to the “On” position.

    If you’re at all unsure, skip this step and move on to calling for help.

    6. Call for Assistance

    Your emergency procedures should include contacting the right help:

    • Roadside assistance service: Use your insurer’s or auto club’s emergency number.
    • Highway patrol or emergency services: Dial 911 for immediate hazards or if someone is injured.
    • Tow truck: Arrange for a tow to a safe repair facility if you can’t restart your car.

    Have your location details ready—mile marker, nearest exit, or GPS coordinates—and describe your vehicle’s make, model, and color.

    7. Wait for Help Safely

    While waiting:

    • Stay well off the road—behind barriers if possible.
    • Avoid standing between your car and traffic.
    • Keep your phone charged and maintain contact with the assistance provider.

    8. Prepare for Future Incidents

    After your breakdown is resolved, consider these preventative measures:

    • Maintain regular service intervals for oil, coolant, brakes, and belts.
    • Carry an emergency kit: flashlight, basic tools, tire repair kit, jumper cables, water, and snacks.
    • Subscribe to a reliable roadside assistance program if you haven’t already.
    • Keep important phone numbers and your insurance card accessible.

    Conclusion

    By following this highway breakdown guide—from identifying warning signs to safe relocation, signaling, and calling for help—you’ll handle roadside emergencies with confidence. Prioritizing roadside safety and clear emergency procedures ensures you and your passengers stay safe until professional assistance arrives.

  • Mastering Roundabouts: Navigating U.S. Intersections with Confidence

    Mastering Roundabouts: Navigating U.S. Intersections with Confidence

    Roundabouts are becoming an increasingly common feature on U.S. roads, praised for improving traffic flow and reducing severe collisions. Yet many drivers feel uncertain when approaching these circular intersections. In this roundabout navigation guide, we’ll cover everything from right‐of‐way rules to lane selection, ensuring your driving roundabouts experience is smooth, safe, and stress‑free.

    1. Why Roundabouts Improve Intersection Safety

    Traditional signalized intersections present multiple conflict points where vehicles cross paths, leading to T‑bone and head‑on crashes. By contrast, modern roundabouts:

    • Reduce conflict points by up to 75% compared to four‑way stops or lights.
    • Force drivers to slow to 15–20 mph, lowering the risk and severity of collisions.
    • Keep traffic moving continuously, cutting idle time and emissions.

    Understanding these benefits will help you embrace intersection safety and approach roundabouts with the right mindset.

    2. Approaching the Roundabout

    Proper roundabout navigation begins well before you enter the circular roadway:

    2.1 Observe the Signs and Road Markings

    • Yield lines: White triangles painted on pavement indicate where to give way.
    • Lane arrows: Overhead or road‑surface arrows show which lanes serve which exits.
    • Advance warning signs: Circular yellow signs and “Roundabout Ahead” posts alert you to slow down.

    2.2 Choose the Correct Lane

    Multi‑lane roundabouts require attention to lane selection:

    • Rightmost lane: Generally for first exits (right turn) or going straight.
    • Left lane: For straight, left turns, or U‑turns—depending on posted signs.
    • Center or middle lanes: May serve multiple exits; follow pavement markings carefully.

    If in doubt, stay in the rightmost lane and use the first exit—this is the safest option for unfamiliar roundabouts.

    3. Entering and Circulating

    Once you’ve positioned correctly, focus on smooth entry and continuous flow:

    3.1 Yield to Traffic in the Circle

    Always yield to vehicles already in the roundabout. Wait for a safe gap—there is no signal, so this driving roundabouts step is crucial for preventing collisions.

    3.2 Maintain a Steady Speed

    • Aim for 15–20 mph unless posted otherwise.
    • Avoid sudden acceleration or braking inside the circle.
    • Keep an eye on other vehicles—especially larger trucks that require extra space.

    3.3 Stay in Your Lane

    Do not change lanes within the roundabout. If you miss your exit, continue around again—never cut across lanes.

    4. Exiting the Roundabout

    Safe exits depend on clear signaling and lane discipline:

    4.1 Signal Early

    Once past the exit before yours, use your right turn signal to indicate you will be leaving the circle. This alerts drivers behind you and those in adjacent lanes.

    4.2 Watch for Pedestrians and Bicyclists

    Crosswalks often sit just beyond the exit. Reduce speed and yield to any pedestrians or cyclists crossing your path.

    4.3 Merge Smoothly

    Check your mirrors and blind spots before merging onto the exit road. Avoid drifting wide or swinging back, as this could catch other drivers off guard.

    5. Special Situations and Tips

    5.1 Emergency Vehicles

    If you hear sirens, do not stop in the circle. Continue to your exit, then pull over safely to let emergency responders through.

    5.2 Large Vehicles

    Buses and trucks may use the truck apron (raised pavement) in the center. Give them extra space and avoid following too closely.

    5.3 Winter Conditions

    On icy roads, approach slowly and yield generously—icy surfaces can extend stopping distances dramatically. Use gentle inputs to maintain control.

    Conclusion

    By mastering these roundabout navigation strategies—observing signs, choosing the right lane, yielding properly, and signaling clearly—you’ll navigate U.S. roundabouts with confidence and uphold intersection safety. Remember: slow down, stay alert, and respect the flow of traffic. With practice, roundabouts will feel like a natural, efficient way to keep your journeys moving smoothly.

  • How Car Cooling Systems Work to Prevent Overheating

    How Car Cooling Systems Work to Prevent Overheating

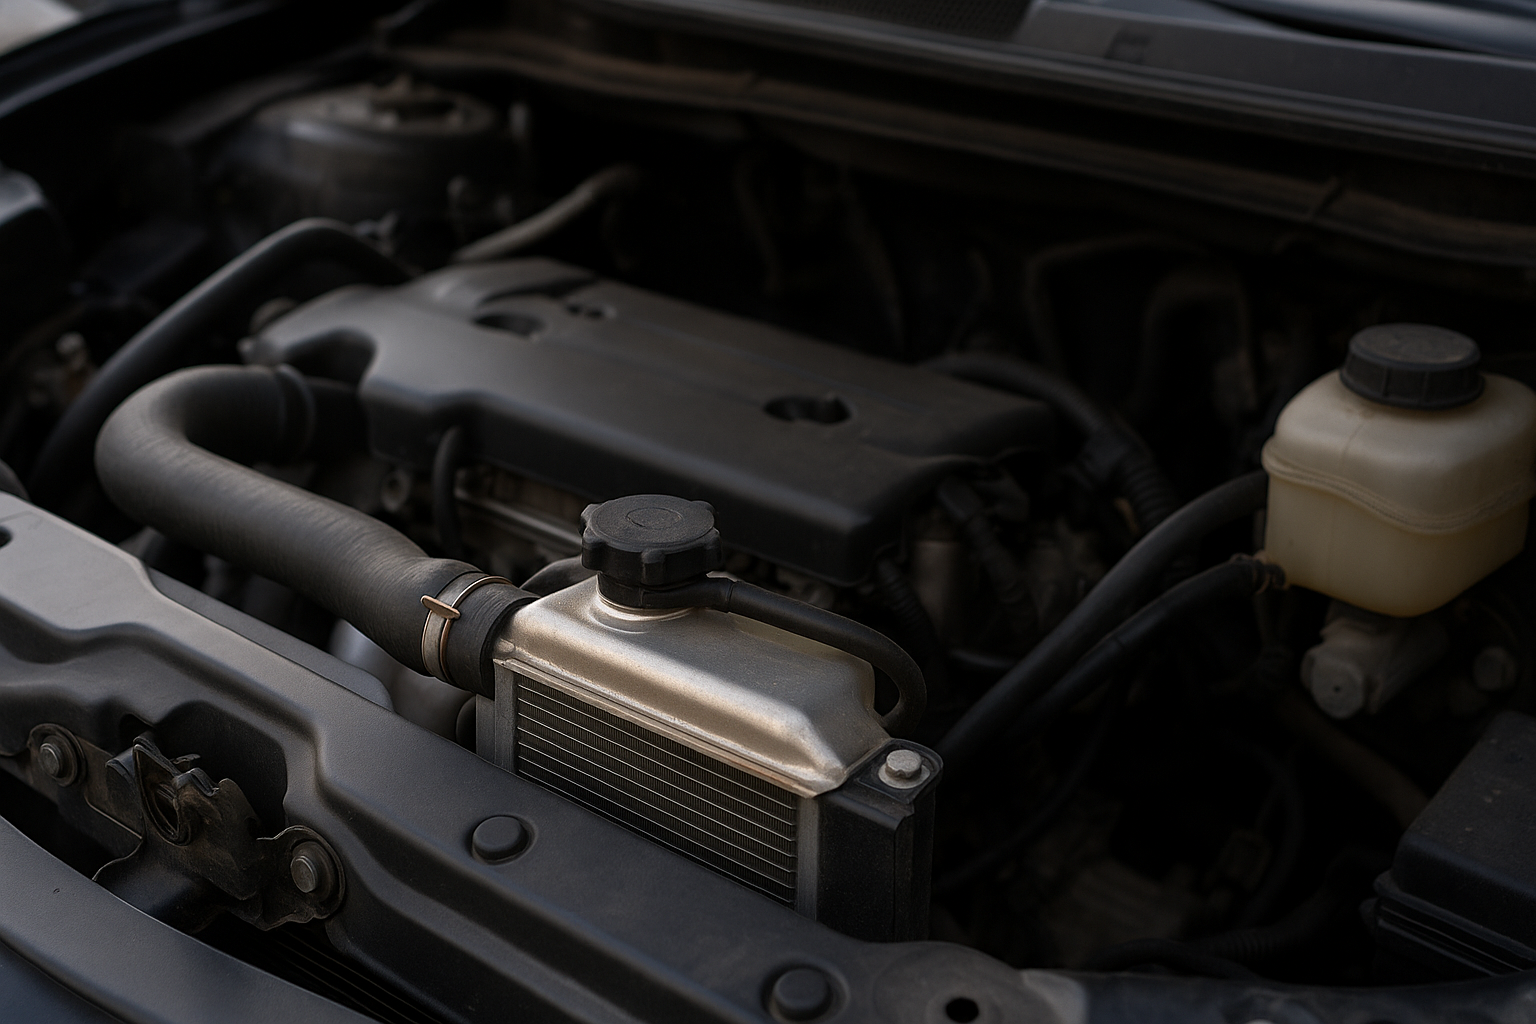
    An effective cooling system overview is essential to keep your engine operating within safe temperature ranges. Without proper engine cooling, internal components can warp, seize, or suffer premature wear. In this guide, we’ll explore how the primary components—including the radiator function, water pump, thermostat, and hoses—work together to regulate temperature and protect your vehicle’s heart.

    1. Cooling System Overview

    The car’s cooling system is a closed-loop network that circulates a water‑based coolant through the engine, absorbing and dissipating heat. Key elements include:

    • Coolant: A mixture of water and antifreeze that transfers heat efficiently and resists freezing.
    • Water Pump: Drives coolant flow through the circuit.
    • Thermostat: Regulates coolant flow based on temperature.
    • Radiator: Releases heat from the coolant into the surrounding air.
    • Hoses & Passages: Connect all components and guide coolant through the engine block and cylinder head.
    • Cooling Fans: Pull air through the radiator when vehicle speed alone isn’t enough.

    By continuously cycling coolant through hot and cool zones, the system maintains engine temperatures typically between 180 °F and 220 °F (82 °C–104 °C).

    2. Radiator Function

    The radiator function is to discard heat absorbed by the coolant. As hot coolant enters the radiator’s top inlet, it travels through a network of thin tubes and fins:

    • Tubes: Carry coolant down through the core.
    • Fins: Expand surface area to accelerate heat transfer to passing air.

    Airflow—either from forward motion or electric fans—draws heat away, cooling the fluid before it returns to the pump. A well‑maintained radiator core ensures efficient heat rejection and prevents hotspots in the engine.

    Radiator Cap & Pressure

    The radiator cap maintains system pressure, raising the coolant’s boiling point. At around 15 psi above atmospheric pressure, the boiling point can exceed 265 °F (129 °C). This keeps the coolant liquid under high temperatures, ensuring uninterrupted circulation.

    3. Coolant Flow & Water Pump

    The water pump is the mechanical heart of the cooling loop. Driven by a belt or electric motor, it pushes cooled fluid from the radiator into the engine’s passages:

    1. Coolant enters the front of the engine block, absorbing heat around cylinders.
    2. It then flows upward into the cylinder head, cooling combustion chambers and valves.
    3. Hot coolant exits the head and heads back to the radiator for heat rejection.

    Consistent flow prevents localized overheating and maintains uniform temperatures across all engine parts.

    4. Thermostat Operation

    The thermostat is a temperature-sensitive valve placed between the engine outlet and radiator inlet. When the engine is cold, the thermostat remains closed, allowing coolant to circulate only through a bypass loop. This speeds up warm‑up and ensures efficient combustion. Once the coolant reaches approximately 195 °F (90 °C), the valve opens, directing fluid through the radiator core for cooling.

    5. Cooling Fans & Auxiliary Components

    At low speeds or idle, airflow through the radiator may be insufficient. Electric or belt‑driven fans engage based on coolant temperature or A/C usage, forcing air through the core. Additional parts supporting engine cooling include:

    • Overflow Reservoir: Captures expanding coolant and returns it as temperatures drop.
    • Hoses & Clamps: Flexible connections that withstand heat and pressure.
    • Heat Exchanger / Heater Core: Transfers engine heat to the cabin for defrost and HVAC.

    6. Maintenance Tips

    To keep your cooling system performing optimally:

    • Inspect & Replace Coolant: Change every 2–5 years per manufacturer recommendations.
    • Check for Leaks: Examine hoses, radiator seams, and pump seals regularly.
    • Test Thermostat & Cap: Replace if you notice slow warm‑up, overheating, or frequent boil‑overs.
    • Clean Radiator Fins: Remove debris to maintain unobstructed airflow.
    • Monitor Fan Operation: Ensure fans engage when the engine is hot or A/C is on.

    Conclusion

    A robust cooling system overview reveals how interdependent components—from the radiator function to the water pump and thermostat—collaborate to deliver reliable engine cooling. Regular inspections, timely coolant changes, and attention to hoses and fans will help your vehicle resist overheating and extend engine life, ensuring dependable performance in all conditions.

  • ABS & Traction Control: How Safety Systems Keep You on the Road

    ABS & Traction Control: How Safety Systems Keep You on the Road

    Modern vehicles come equipped with advanced vehicle safety features designed to help drivers maintain control in slippery or emergency situations. Two of the most important systems are the Anti‑Lock Braking System (ABS) and traction control. In this guide, we’ll explain how each system works, explore their benefits, and show why understanding ABS explained can make you a safer driver.

    1. What Is ABS? ABS Explained

    The Anti‑Lock Braking System prevents your wheels from locking up under heavy braking, allowing you to steer around obstacles instead of skidding straight ahead. Here’s how it works:

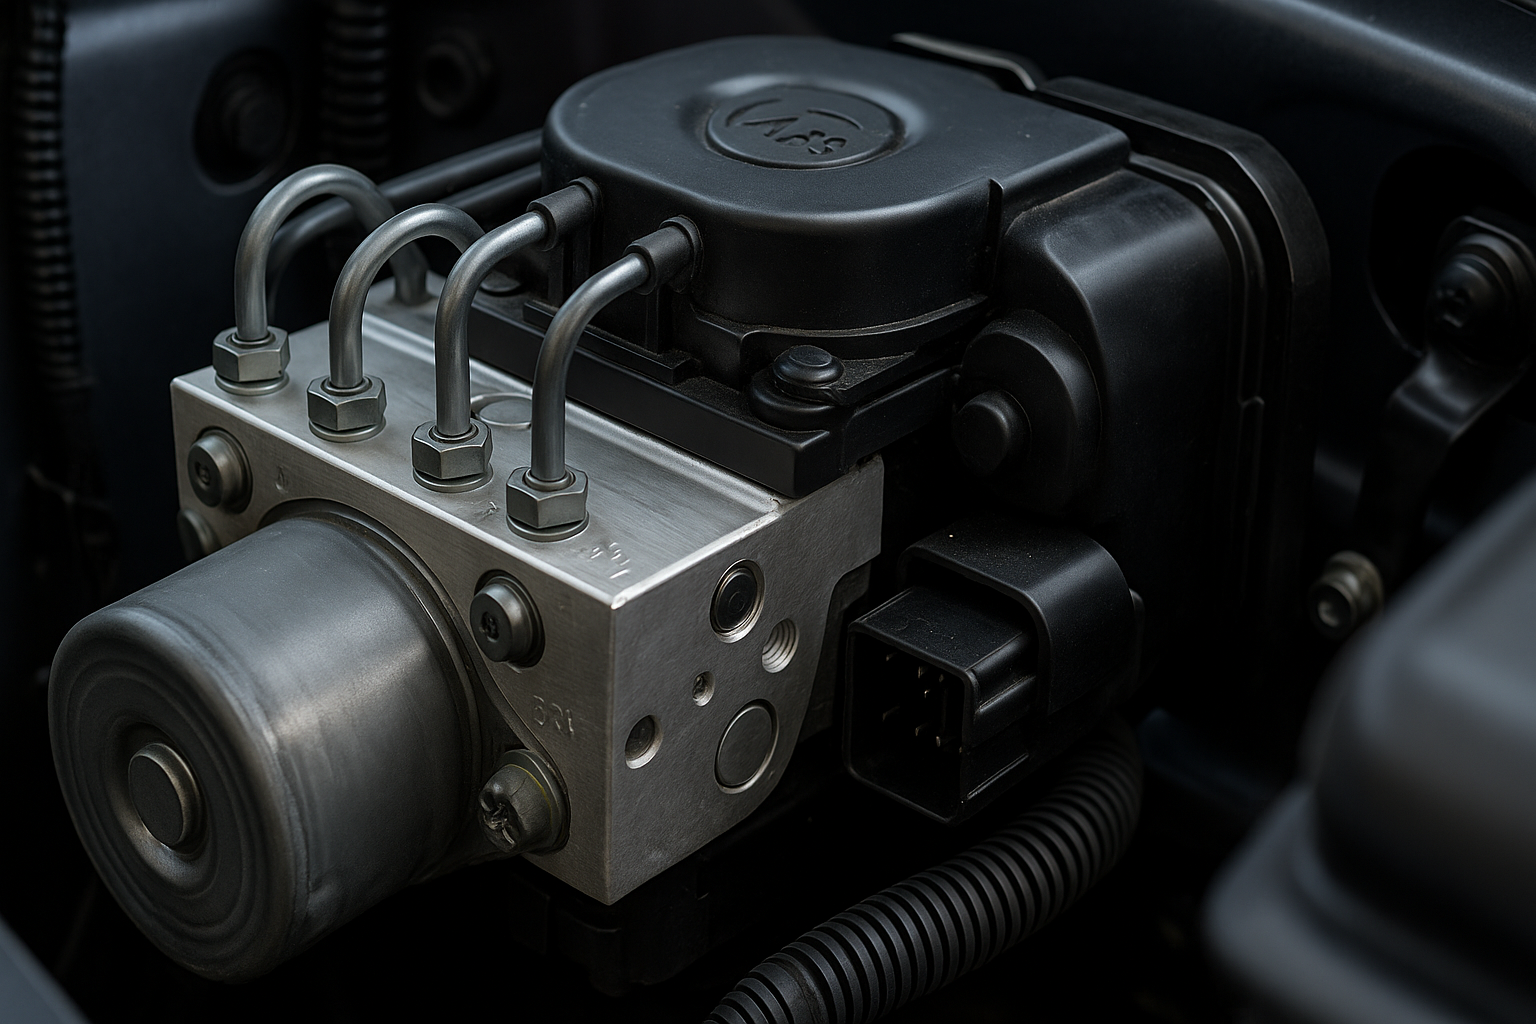
    • Wheel Speed Sensors: Each wheel has a sensor that monitors its rotational speed.
    • Electronic Control Unit (ECU): Detects when a wheel is about to lock by comparing wheel speeds.
    • Hydraulic Modulator: Rapidly pulses brake pressure three to fifteen times per second to maintain traction.

    By modulating brake pressure, ABS keeps the tire’s contact patch from sliding uncontrollably, reducing stopping distances on wet or icy roads and enabling you to maintain steering control.

    2. How Traction Control Works

    Traction control complements ABS by preventing wheel spin during acceleration. It uses many of the same wheel‑speed sensors and ECU logic:

    • Detection: Sensors notice when a drive wheel spins faster than the others, indicating a loss of grip.
    • Intervention: The ECU reduces engine torque—by retarding ignition timing or cutting fuel—and/or applies brake pressure to the spinning wheel.
    • Restoration: Once traction returns, normal power delivery resumes.

    Traction control helps you launch more smoothly on slippery surfaces, such as wet pavement or loose gravel, reducing wheel spin and improving directional stability.

    3. ABS vs. Traction Control: Key Differences

    While both systems rely on wheel‑speed sensors, their purposes differ:

    • ABS: Activates during braking to prevent wheel lock‑up and maintain steering control.
    • Traction Control: Activates during acceleration to prevent wheel spin and maintain forward momentum.

    Together, they form a coordinated safety network, with ABS managing deceleration and traction control managing acceleration, both leveraging the same brake‑hydraulic hardware and ECU intelligence.

    4. Benefits of ABS & Traction Control

    Understanding these vehicle safety features highlights several real‑world advantages:

    • Shorter Stopping Distances: ABS can reduce braking distance by up to 20% on wet roads.
    • Improved Steering Control: Prevents skidding, allowing drivers to steer around hazards while braking.
    • Smoother Acceleration: Traction control minimizes wheel spin, especially on ice or gravel.
    • Reduced Tire Wear: Controlled braking and acceleration reduce flat spots and uneven wear.
    • Enhanced Confidence: Drivers feel more secure knowing their car will help modulate braking and power delivery.

    5. When to Rely on These Systems

    While ABS and traction control intervene automatically, it’s helpful to know when they engage:

    • Wet or Icy Roads: Sudden braking or hard acceleration will trigger ABS and traction control most effectively.
    • Loose Surfaces: Gravel, sand, or snow often cause wheel slip, where traction control shines.
    • Emergency Maneuvers: Panic stops will activate ABS, helping you steer around unexpected obstacles.

    Note that these systems improve safety but do not replace proper driving techniques—maintaining safe following distances and adjusting speed for conditions remain essential.

    6. Maintenance and Troubleshooting

    To ensure your ABS and traction control continue to function:

    • Inspect Wheel Sensors: Clean sensors and wiring regularly; replace damaged components.
    • Check Brake Fluid: Maintain proper levels and change fluid according to manufacturer guidelines.
    • Monitor Warning Lights: An illuminated ABS or traction control light indicates a fault—have it diagnosed and repaired promptly.
    • Keep Tires in Good Condition: Match tire sizes and pressure on all wheels to ensure sensor accuracy.

    Conclusion

    By understanding ABS explained and the workings of traction control, you’ll appreciate how these vehicle safety features combine to keep you in command—whether you’re braking on a rain‑slick highway or accelerating out of a snowy driveway. Regular maintenance and respect for road conditions will help these systems perform at their best, enhancing safety and confidence on every drive.

  • The Science of Fuel Injection: How Modern Engines Stay Efficient

    The Science of Fuel Injection: How Modern Engines Stay Efficient

    Modern internal combustion engines achieve remarkable engine efficiency thanks to advances in fuel injection systems. Gone are the days of simple carburetors—today’s electronic fuel injection (EFI) precisely meters and times fuel delivery to each cylinder, optimizing power output and reducing emissions. In this article, we’ll explore how EFI works, its key components, and why it’s essential for efficiency and performance.

    1. Evolution from Carburetors to EFI

    Historically, carburetors mixed air and fuel based on vacuum pressure—an inherently imprecise method. In contrast, EFI uses sensors, an electronic control unit (ECU), and injectors to deliver the exact amount of fuel needed at any given moment. This transition has led to:

    • Sharper throttle response
    • Improved fuel economy
    • Lower tailpipe emissions
    • Better cold‑start performance

    2. Key Components of an Electronic Fuel Injection System

    An EFI system consists of several interconnected parts that work together to maintain optimal air‑fuel ratios (typically around 14.7:1 for gasoline engines).

    2.1 Engine Control Unit (ECU)

    • Central “brain” that processes sensor inputs.
    • Runs fuel‑mapping software to determine injector pulse width.
    • Adjusts ignition timing for robust performance and efficiency.

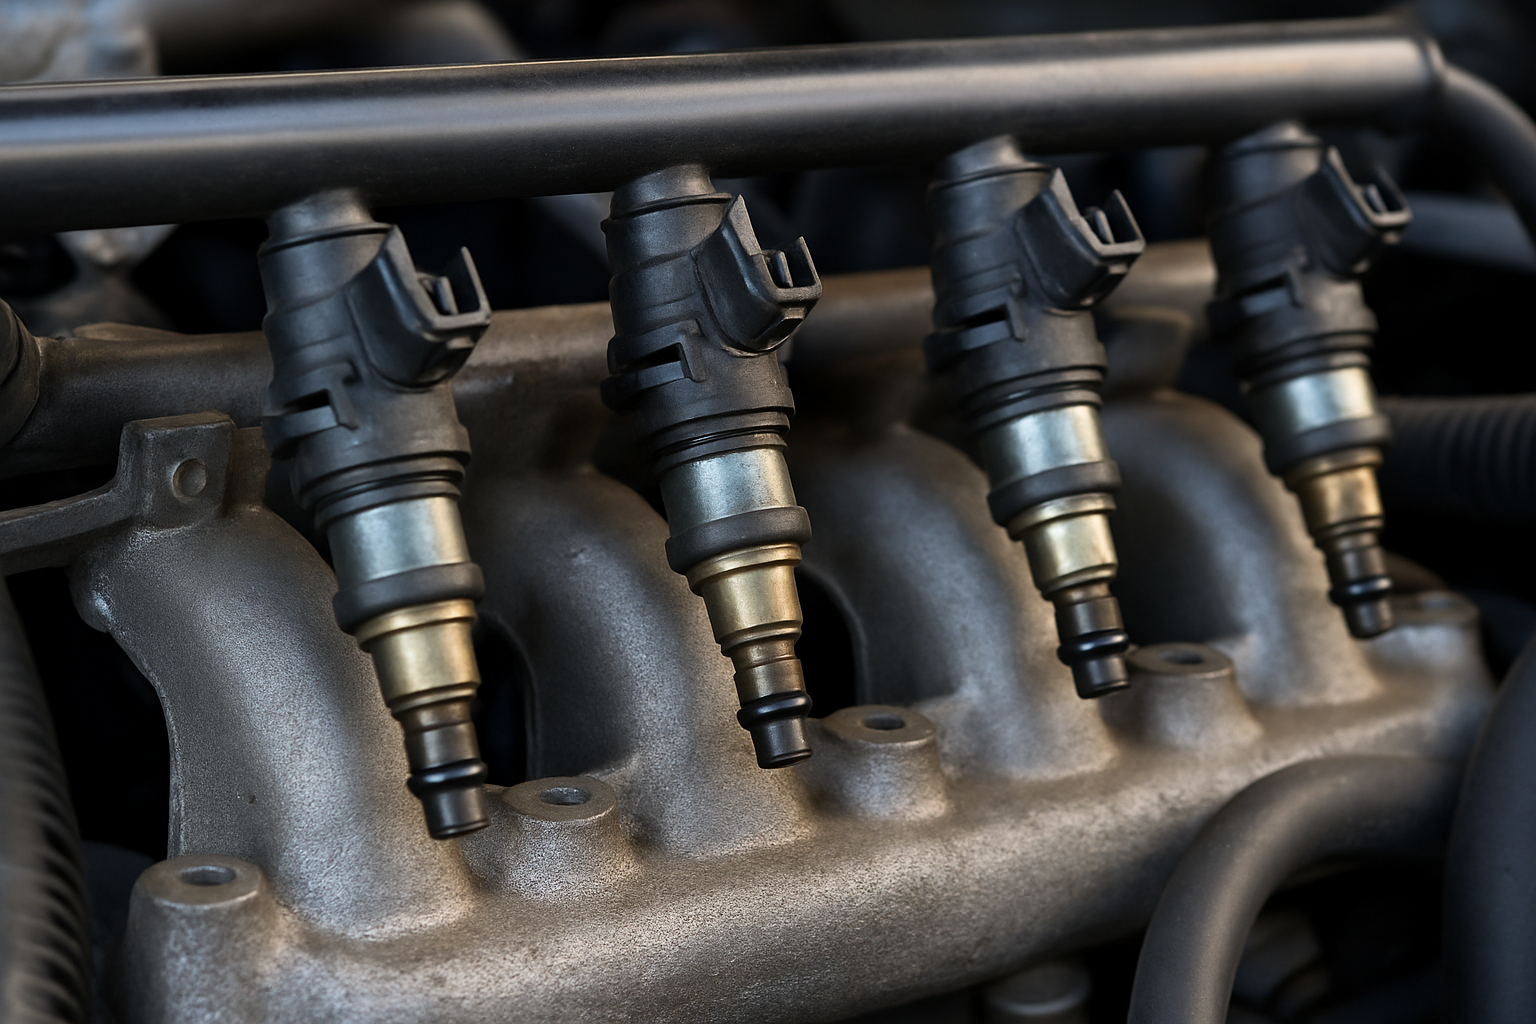
    2.2 Fuel Injectors

    • High‑precision nozzles that spray atomized fuel directly into the intake port or combustion chamber.
    • Controlled by the ECU as rapid on/off pulses, typically measured in milliseconds.
    • Ensure fine atomization for complete combustion.

    2.3 Sensors

    Modern EFI relies on multiple sensors to monitor engine and environmental conditions:

    • Mass Air Flow (MAF) Sensor: Measures incoming air volume.
    • Manifold Absolute Pressure (MAP) Sensor: Tracks engine load.
    • Oxygen (O₂) Sensor: Monitors exhaust composition to fine‑tune air‑fuel mix.
    • Engine Coolant Temperature (ECT) Sensor: Adjusts fueling during warm‑up.
    • Throttle Position Sensor (TPS): Detects driver’s throttle input.

    3. How EFI Delivers Engine Efficiency

    The primary goal of EFI is to maintain the stoichiometric air‑fuel ratio, where combustion is most complete. Here’s how EFI contributes to efficiency:

    3.1 Precise Fuel Metering

    By varying injector pulse width based on real‑time sensor data, EFI ensures just enough fuel is injected for combustion—no more, no less. This precision minimizes wasted fuel and reduces unburned hydrocarbons.

    3.2 Adaptive Learning

    Many modern ECUs feature adaptive algorithms that learn engine behavior over time. They compensate for changes such as aging sensors, fuel quality variations, and altitude differences, continually refining fuel maps for consistent engine efficiency.

    3.3 Multi‑Point vs. Direct Injection

    EFI has evolved into two main architectures:

    • Multi‑Point Fuel Injection (MPFI): Injectors spray fuel into each intake port upstream of the intake valve.
    • Gasoline Direct Injection (GDI): Injectors deliver fuel directly into the combustion chamber under high pressure, allowing stratified charge and lean‑burn operation for enhanced efficiency.

    4. Benefits Beyond Mileage

    While improved gas mileage is a key advantage, EFI offers additional benefits:

    • Lower Emissions: Precise combustion reduces NOₓ, CO, and unburned hydrocarbons.
    • Better Drivability: Smooth idle, quick starts, and linear throttle response.
    • Enhanced Durability: Cleaner combustion leaves fewer deposits on valves and pistons.

    5. Maintaining Your EFI System

    To ensure continued performance and engine efficiency, follow these maintenance tips:

    • Replace Fuel Filters: Prevent injector clogging and preserve flow rates.
    • Use Quality Fuel: Detergent additives help keep injectors and intake ports clean.
    • Inspect Sensors: Clean or replace faulty MAF/O₂ sensors to maintain accurate readings.
    • Periodic ECU Updates: Some manufacturers release software updates for optimized fuel maps.

    Conclusion

    The fuel injection system—particularly electronic fuel injection—is a cornerstone of modern automotive design, balancing power and efficiency through precise metering and advanced controls. By understanding how EFI works and caring for its components, you’ll enjoy smoother performance, better fuel economy, and cleaner emissions, ensuring your engine stays healthy and efficient for years to come.