Category: Auto 101 & Terminology

  • Steering & Suspension Basics: Keeping Your Ride Smooth

    Steering & Suspension Basics: Keeping Your Ride Smooth

    A comfortable drive isn’t just about plush seats—it starts with a well‑tuned steering system and solid suspension basics. Together, these components absorb bumps, maintain tire contact, and ensure precise control. In this guide, we’ll explore how your car’s steering and suspension work, why they matter for ride comfort, and what you can do to keep both systems in top shape.

    1. How Your Steering System Works

    Your steering system directs the vehicle’s wheels so you can navigate corners, lanes, and curves with confidence. Modern cars typically use a rack‑and‑pinion design with power assistance:

    • Rack & Pinion: A gearset converts the rotational motion of the steering wheel into lateral motion that turns the wheels.
    • Power Steering: Uses hydraulic or electric assist to reduce the effort required, especially at low speeds.
    • Tie Rods & Steering Arms: Connect the rack to the wheel hubs, transmitting motion precisely.

    Common Steering Issues

    • Loose Steering Feel: Worn tie‑rod ends or rack bushings can introduce play, reducing control.
    • Squealing or Hissing: A failing power‑steering pump or low fluid can create noise and stiff steering.
    • Pulling to One Side: Misalignment or uneven tire pressure may cause your car to drift.

    2. Suspension Basics: Absorbing Road Irregularities

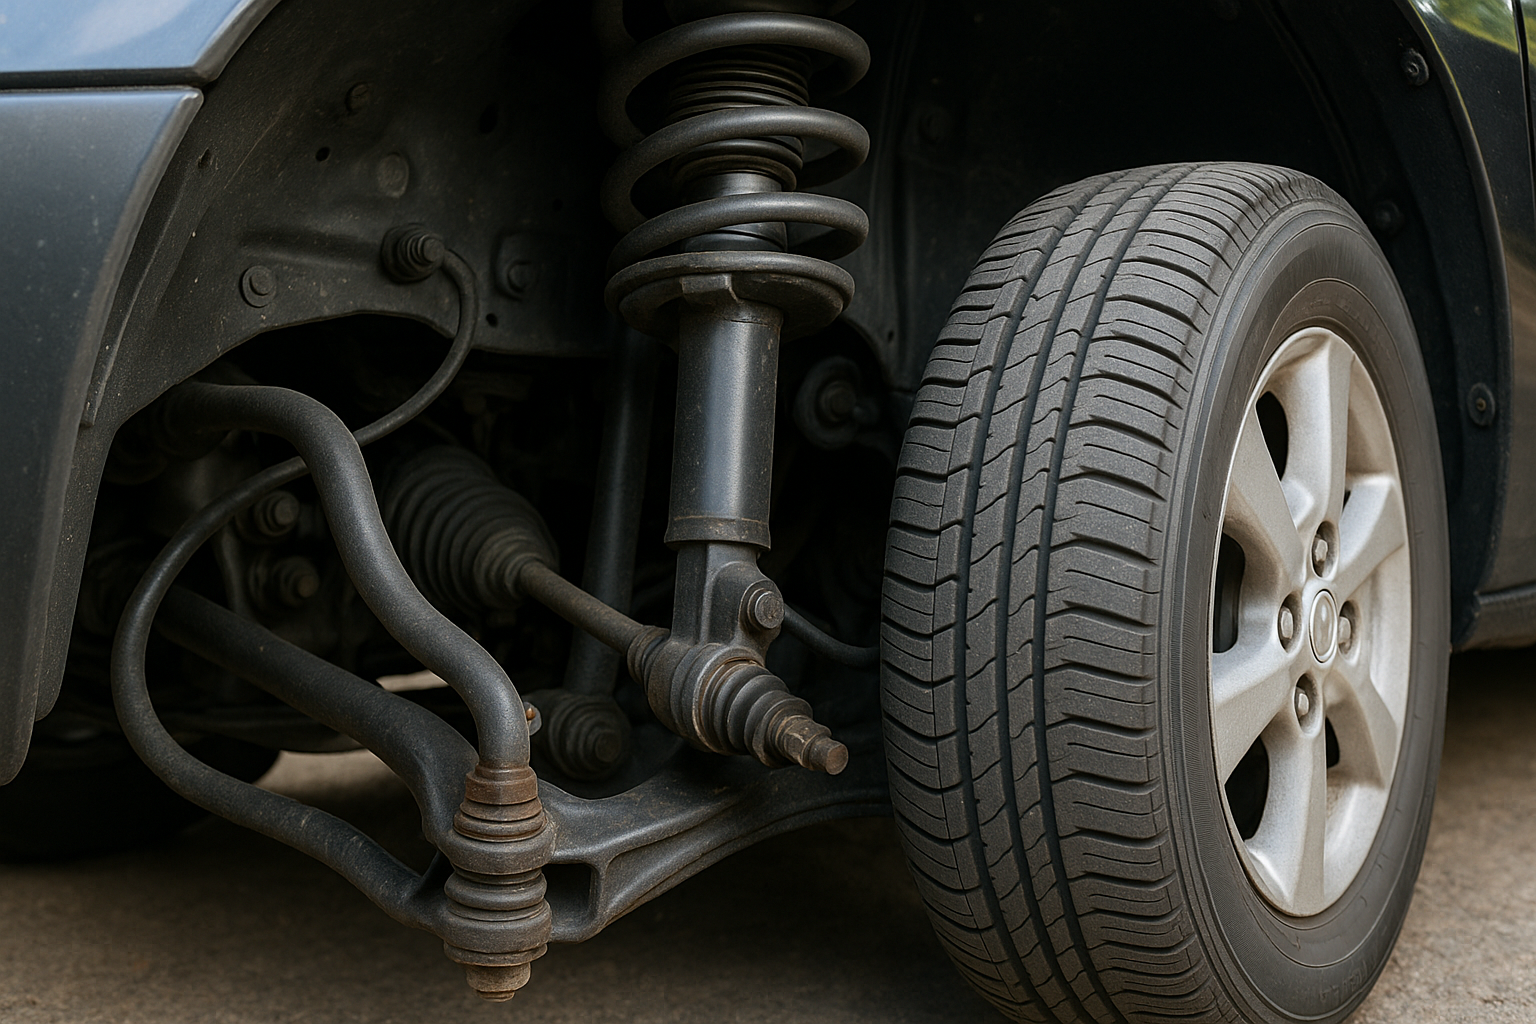
    The suspension system is your car’s shock absorber, smoothing out potholes, bumps, and road chatter. Key suspension basics components include:

    • Springs: Coil springs or leaf springs support vehicle weight and compress under load.
    • Shock Absorbers & Struts: Control spring oscillation, dampening rebound and preventing excessive bounce.
    • Control Arms & Ball Joints: Keep wheels aligned and provide flexible mounting points for suspension travel.
    • Sway Bars (Anti‑Roll Bars): Reduce body roll during cornering by linking opposite wheels.

    Types of Suspension

    • MacPherson Strut: Compact and cost‑effective—common on front‑wheel‑drive cars.
    • Double Wishbone: Offers better camber control—favored on performance vehicles.
    • Multi‑Link: Provides independent tuning of ride and handling—found on luxury models.

    3. Why Steering and Suspension Matter for Ride Comfort

    A well‑maintained steering system and properly tuned suspension directly improve ride comfort by:

    • Smoothness: Efficient absorption of bumps prevents jolts from reaching the cabin.
    • Stability: Consistent tire contact enhances traction and reduces body roll.
    • Control: Precise steering response makes for a confident, fatigue‑free drive.

    Signs Your Ride Needs Attention

    • Excessive bouncing after hitting a bump.
    • Front‑end vibration or wandering at highway speeds.
    • Uneven or rapid tire wear patterns.
    • Steering feels heavy, loose, or unresponsive.

    4. Maintenance Tips for a Smooth Ride

    Regular upkeep of your steering and suspension keeps you safe and comfortable on the road. Here’s what to do:

    • Inspect Components: Every 6,000 miles, check shocks, struts, bushings, and tie rods for leaks or play.
    • Rotate & Balance Tires: Proper rotation and balance reduce uneven wear and vibration.
    • Maintain Fluid Levels: Keep power‑steering fluid at the correct level and replace it according to the manufacturer’s schedule.
    • Wheel Alignment: Perform a 4‑wheel alignment annually or after suspension work to ensure correct steering geometry.
    • Replace Worn Parts Promptly: Swap out failing shocks, struts, or bushings before they cause further damage.

    Conclusion

    Mastering suspension basics and understanding your steering system are key steps toward achieving superior ride comfort. By recognizing warning signs, following a routine maintenance schedule, and choosing quality replacement parts, you’ll enjoy a smoother, safer, and more enjoyable driving experience for years to come.
  • Automatic vs. Manual Transmissions: Pros and Cons

    Automatic vs. Manual Transmissions: Pros and Cons

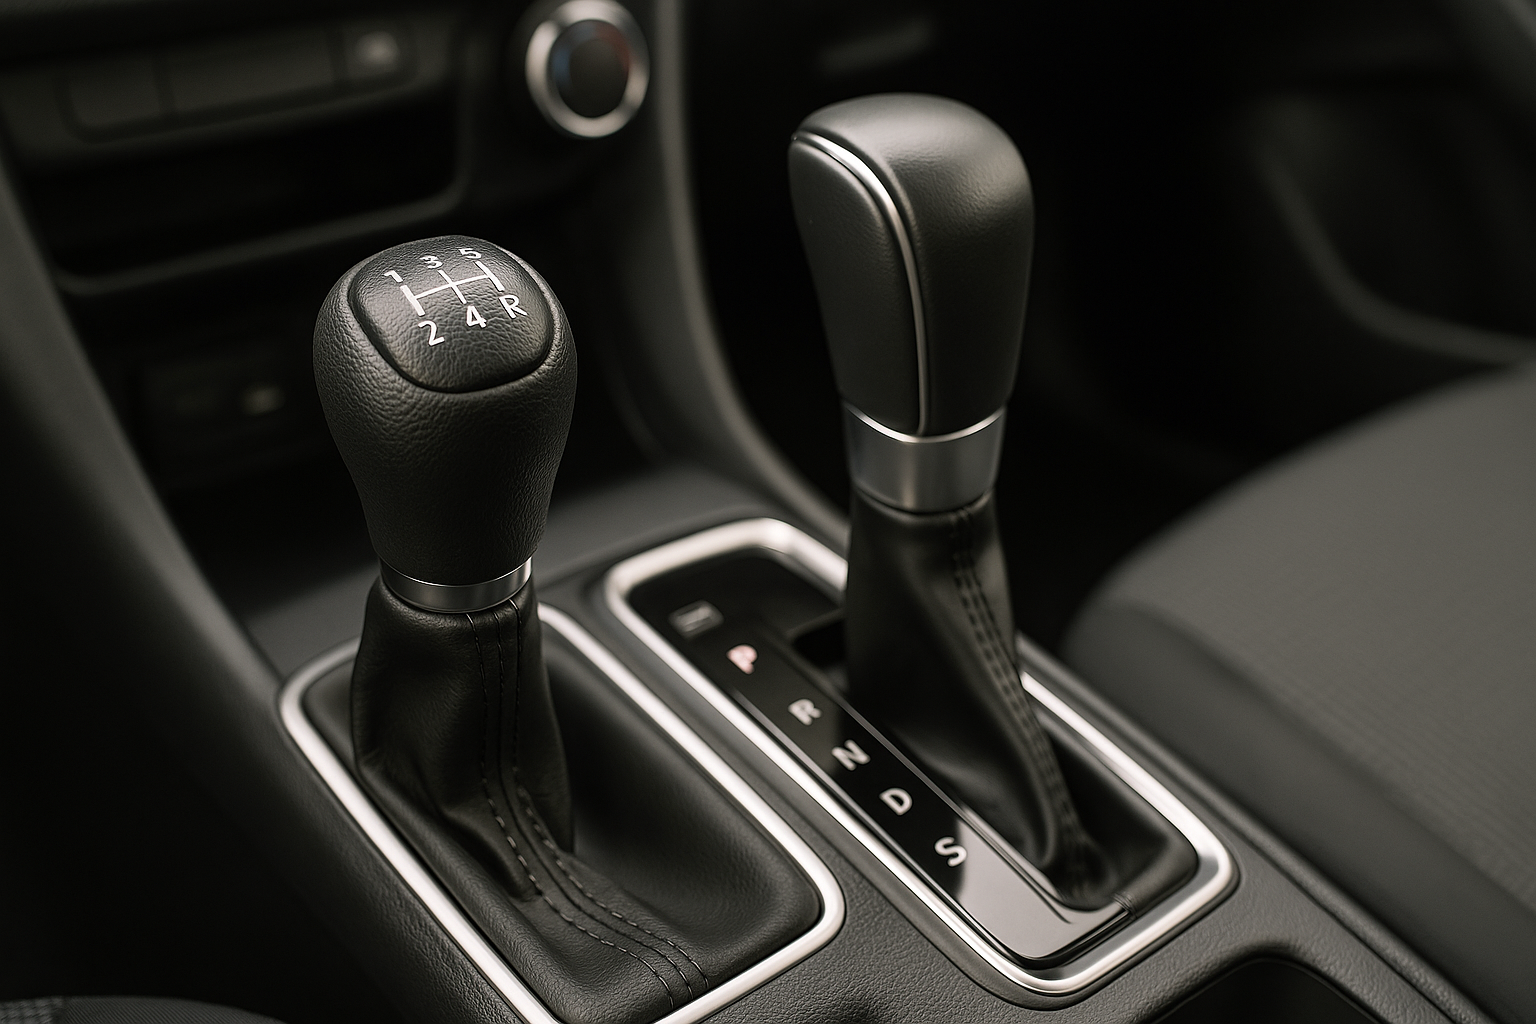
    When shopping for a new car, one of the first choices you’ll face is automatic vs manual transmission. Understanding the differences between transmission types and performing a thorough gearbox comparison can help you choose the right vehicle for your driving style. In this article, we’ll explore how each system works, weigh the pros and cons, and offer tips on selecting the best option.

    1. Overview of Transmission Types

    Modern vehicles typically come with two main transmission types:

    • Automatic Transmission: Uses a torque converter or dual‑clutch system to shift gears without driver input.
    • Manual Transmission (Stick Shift): Requires the driver to engage the clutch and select gears using a gear lever.

    Each type has evolved with technology—automatic gearboxes now offer more gears and improved efficiency, while manuals boast simplicity and driver engagement.

    2. How Automatic Transmissions Work

    An automatic transmission relies on hydraulic fluid and planetary gear sets to change gears seamlessly. Key components include:

    • Torque Converter: Replaces the clutch, allowing the engine to spin somewhat independently of the transmission.
    • Planetary Gear Sets: Provide multiple gear ratios within a compact design.
    • Electronic Controls: Sensors and actuators determine shift timing for smooth performance.

    Pros of Automatic Transmissions

    • Ease of Use: No clutch pedal makes driving in traffic less stressful.
    • Smooth Shifts: Modern automatics often shift faster and more efficiently than humans.
    • Wider Availability: Most new cars, especially crossovers and luxury models, come standard with automatics.

    Cons of Automatic Transmissions

    • Higher Cost: Automatics are generally more expensive to buy and maintain.
    • Fuel Efficiency: Older automatics lag behind manuals, though newer designs have largely closed the gap.
    • Complexity: More moving parts can mean higher repair costs if something goes wrong.

    3. How Manual Transmissions Work

    A manual transmission uses a clutch pedal and gear lever to transfer power from the engine to the wheels. Main elements include:

    • Clutch Assembly: Engages and disengages the engine from the gearbox.
    • Gearbox: Contains a set of gears that the driver selects.
    • Shift Linkage: Mechanically connects the gear lever to the transmission.

    Pros of Manual Transmissions

    • Driver Control: Greater engagement and ability to hold gears for acceleration or engine braking.
    • Lower
  • Brake System Components Explained: Pads, Rotors, and Calipers

    Brake System Components Explained: Pads, Rotors, and Calipers

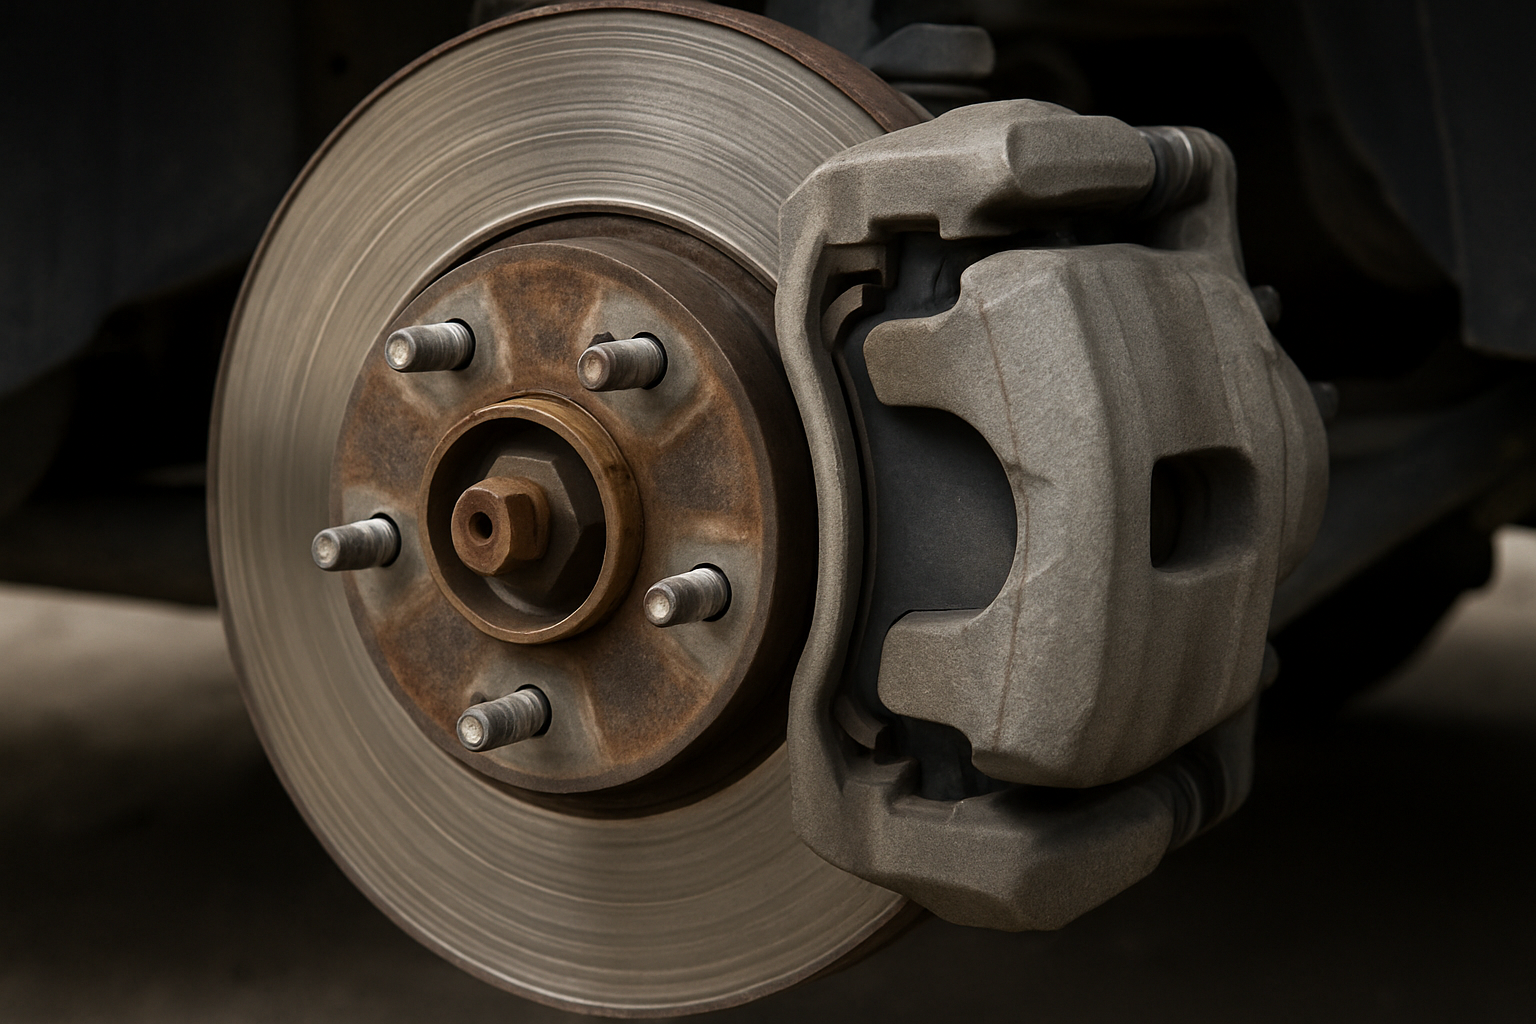
    Your car’s stopping power depends entirely on its brake system working flawlessly. Understanding the key brake system parts—from the friction‑generating pads to the spinning rotors and the hydraulic calipers—will help you appreciate how brakes work and why regular brake maintenance is essential. In this guide, we’ll break down each component’s role, explain the braking process step by step, and share maintenance tips to keep your brakes performing safely.

    1. Core Brake System Parts

    Brake Pads

    Brake pads are the replaceable friction material that clamp down on the rotor to slow your vehicle. They consist of a metal backing plate bonded to a high‑friction composite surface. As the pads wear against the rotor, they gradually thin out and must be replaced—typically every 30,000 to 70,000 miles depending on driving style and pad compound.

    Brake Rotors (Discs)

    Rotors are the smooth, flat discs that spin with each wheel. When you press the brake pedal, the caliper squeezes the pads against both sides of the rotor, converting your car’s kinetic energy into heat. Rotors come in various designs—solid, vented, drilled, and slotted—to manage heat dissipation and resist warping under heavy use.

    Brake Calipers

    Calipers house the hydraulic pistons that push the pads into the rotor. In a typical floating‑caliper design, the caliper body slides on pins, allowing it to self‑center over the rotor. High‑performance cars may use fixed calipers with multiple pistons for more even pressure distribution and quicker response.

    2. How Brakes Work: The Hydraulic Braking Process

    The modern automotive brake system uses hydraulic fluid to transmit force from the pedal to the calipers. Here’s a step‑by‑step overview of how brakes work:

    1. Pushing the Pedal: When you depress the brake pedal, it pushes a piston in the master cylinder, forcing brake fluid out through the brake lines.
    2. Fluid Transfer: The incompressible brake fluid travels through metal and rubber lines to each wheel’s caliper.
    3. Caliper Activation: Inside the caliper, the fluid pressure pushes one or more pistons outward.
    4. Pad Engagement: The pistons press the brake pads against the spinning rotor’s surface.
    5. Friction & Heat: The pad‐to‐rotor friction slows wheel rotation, converting motion into heat, which dissipates into the air through the rotor design.
    6. Releasing the Pedal: Releasing the brake pedal reduces hydraulic pressure, retracting the pistons and letting the pads pull away from the rotor.

    3. Brake Maintenance Best Practices

    Regular brake maintenance keeps all components in good shape and prevents costly repairs or dangerous failures. Follow these guidelines:

    • Inspect Pads & Rotors: Check pad thickness and rotor surface every 6,000 miles. Replace pads below manufacturer‑specified minimum thickness (usually around 3 mm) and resurface or replace rotors showing scoring or warping.
    • Bleed the Brake Lines: Flush and replace brake fluid every 2 years or 24,000 miles. Moisture in old fluid can corrode calipers and reduce braking efficiency.
    • Check Caliper Function: Ensure caliper pistons move freely. Sticking calipers can cause uneven pad wear and overheating.
    • Listen for Warning Signs: Squealing or grinding noises often indicate worn pads or glazed rotors. Vibration in the pedal or steering wheel under braking can signal warped rotors.
    • Use Quality Parts: Always choose OEM or high‑quality aftermarket pads and rotors that match your vehicle’s specifications for optimal performance and longevity.

    4. When to Seek Professional Help

    While many maintenance tasks are DIY‑friendly, seek a qualified mechanic if you notice any of the following:

    • Brake pedal gradually sinking toward the floor.
    • Fluid leaks near wheels or under the master cylinder.
    • Extreme vibration or “pulsing” under braking.
    • Unusual dashboard warning lights (e.g., ABS indicator).

    Timely professional inspection ensures your safety and prevents small issues from becoming major repairs.

    Conclusion

    By understanding the roles of brake system parts—pads, rotors, and calipers—you’ll know exactly how brakes work and when to perform crucial brake maintenance. Regular inspections, fluid changes, and timely part replacements not only extend the life of your braking system but also keep you safe on the road. Make brake care a priority, and you’ll enjoy peace of mind every time you press the pedal.

  • Understanding Tire Sizes & Speed Ratings

    Understanding Tire Sizes & Speed Ratings

    When shopping for new tires, the codes stamped on the sidewall can look like alphabet soup. But knowing how to read a tire size guide and interpret tire markings is essential for choosing the right fit. Equally important is understanding the speed rating—the maximum sustained speed a tire can safely handle. In this article, we’ll break down the most common tire codes and explain how speed ratings impact performance and safety.

    1. Decoding the Tire Size Code

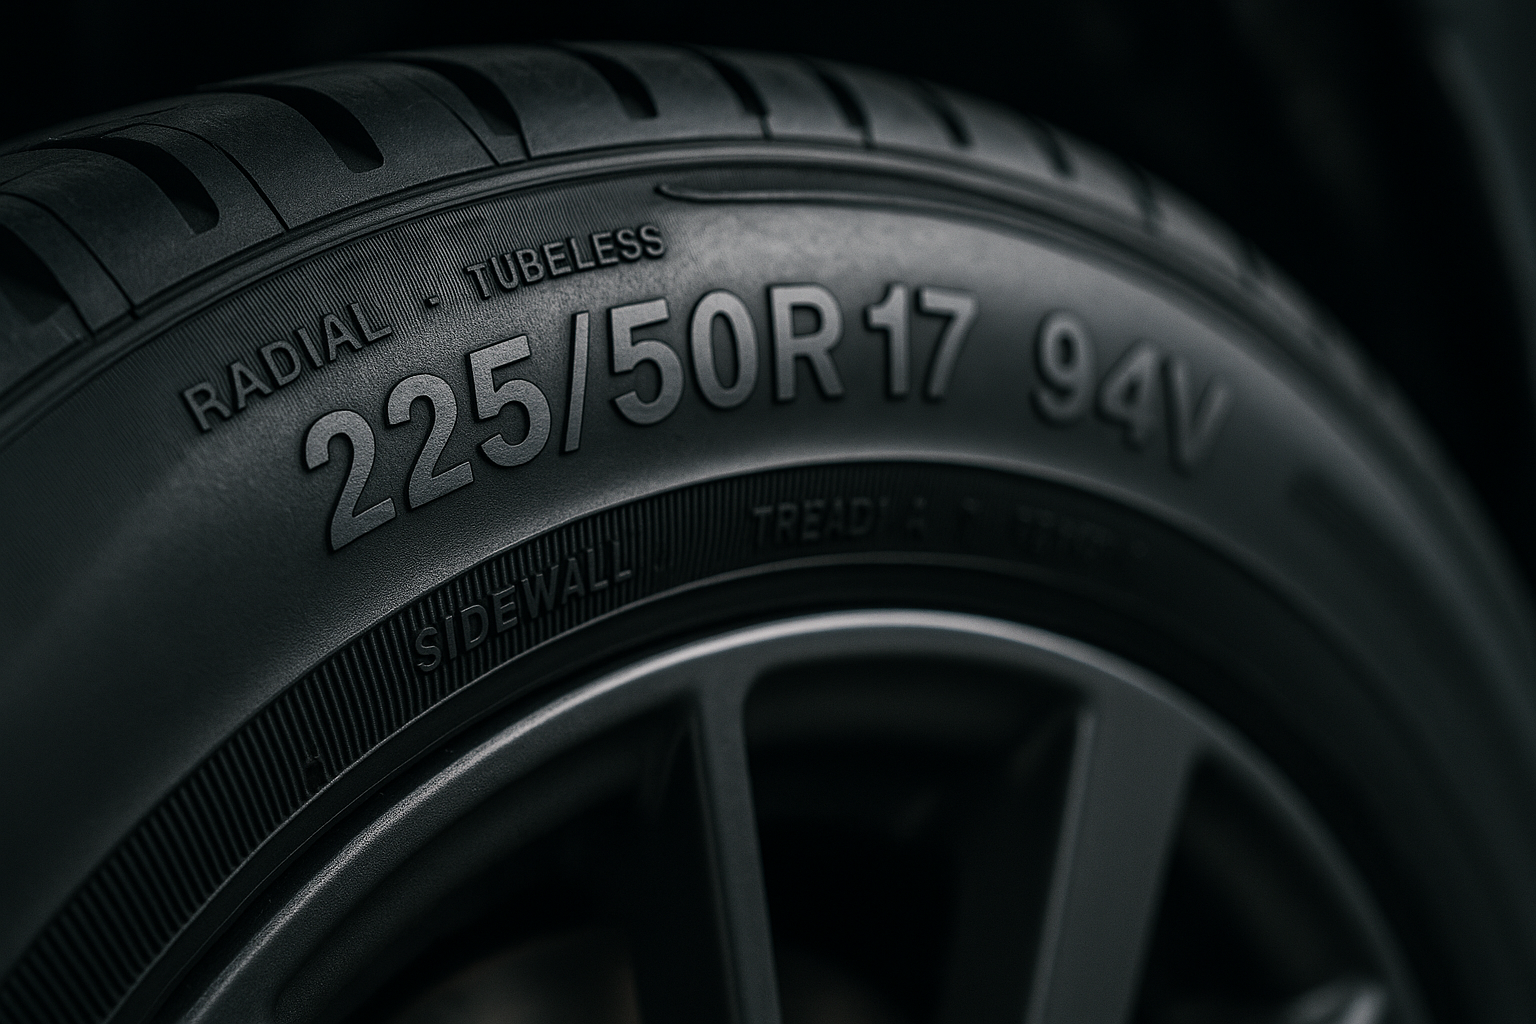
    A typical passenger‑car tire code looks like this: P205/60R16 92H. Each segment carries specific information:

    • P – Tire type. “P” stands for passenger car; “LT” for light truck.
    • 205 – Section width in millimeters (tire’s cross‑section from sidewall to sidewall).
    • 60 – Aspect ratio (height of sidewall as a percentage of width). Here, sidewall height = 60% of 205 mm.
    • R – Construction type (“R” for radial).
    • 16 – Wheel diameter in inches.
    • 92 – Load index (maximum load capacity; check load‑index charts for pounds or kilograms).
    • H – Speed rating (see next section).

    Why Tire Size Matters

    Choosing the correct size ensures your speedometer reads accurately, maintains proper steering response, and avoids rubbing against suspension components. Always refer to your vehicle owner’s manual or door‑jamb placard for the manufacturer’s recommended sizes.

    2. What Is a Speed Rating?

    The speed rating is a standardized letter—A through Z—that indicates the maximum sustained speed a tire can withstand under controlled conditions. For example:

    • S (112 mph / 180 kph): Common on family sedans and minivans.
    • H (130 mph / 210 kph): Often found on sports sedans and coupes.
    • V (149 mph / 240 kph): Typical for performance‑oriented vehicles.
    • W (168 mph / 270 kph) & Y (186 mph / 300 kph): High‑performance tires for sports cars.

    Note that speed ratings do not mean you should drive at those speeds—always obey posted limits and adjust for road conditions.

    Speed Rating vs. Recommended Speed

    While the tire may be rated for high speeds, automakers and tire manufacturers recommend driving well below that threshold to allow safety margins for heat buildup, wear, and varying road conditions.

    3. Locating Your Tire Speed Rating

    Your tire’s speed rating is the last character in the size code printed on the sidewall. For instance, in P205/60R16 92H, the “H” tells you the speed capability. If you don’t see it, check the owner’s manual or the tire placard:

    • Driver’s side door jamb
    • Fuel‑fill door
    • Inside the glovebox door

    Ensure all four tires share the same speed rating to maintain consistent handling and performance.

    4. Why Speed Ratings Matter for Safety & Performance

    Speed ratings are determined through rigorous laboratory testing under specific load and inflation conditions. Real‑world factors like under‑inflation, overloading, and wear can reduce actual speed capability. Here’s why you should pay attention:

    • Handling & Stability: Higher‑rated tires often have stiffer sidewalls, improving cornering response.
    • Heat Resistance: Tires generate heat at speed—higher ratings ensure better heat dissipation.
    • Load Capacity: Speed and load are related—exceeding recommended speeds under heavy load can overstrain the tire.

    Common Pitfalls

    Mixing tires with different speed ratings can lead to uneven performance, especially in emergency maneuvers. Never downgrade below the manufacturer’s recommended rating to save cost—it compromises safety.

    5. Tips for Choosing the Right Tires

    • Consult Your Manual: Always start with the vehicle manufacturer’s recommendations.
    • Match Ratings: Keep speed rating and load index consistent across all tires.
    • Consider Your Driving Style: If you regularly tow, accelerate hard, or drive fast on highways, opt for a higher rating within your vehicle’s tolerance.
    • Check for Updates: Tire technology evolves—review seasonal or performance upgrades periodically.

    Conclusion

    Understanding a tire size guide and correctly reading tire markings—including the speed rating—is fundamental to vehicle safety and performance. Always choose the appropriate size, load index, and speed rating for your car, and follow maintenance best practices for a smooth, secure ride.

  • What Your Engine’s Horsepower Really Means

    What Your Engine’s Horsepower Really Means

    When you’re shopping for a new car or simply geek out over specs, you’ve probably seen the term horsepower tossed around. But what exactly does horsepower meaning entail, and how does it relate to engine performance and overall car power? In this guide, we’ll break down the origins of horsepower, explain how it’s measured, and show you why it matters for your driving experience.

    1. The Origin of Horsepower

    The concept of horsepower dates back to the 18th century, when engineer James Watt wanted to compare the output of steam engines to the work done by draft horses. He determined that one average draft horse could do 550 foot-pounds of work per second, which became the benchmark of one horsepower.

    How Watt Calculated Horsepower

    • Force: Watt estimated a horse could pull 180 pounds through a distance of 24 feet per minute.
    • Work rate: 180 lbs × 24 ft/min = 4,320 ft‑lbs/min.
    • Conversion: Dividing by 33,000 (ft‑lbs per minute) gives approximately 0.131 horsepower per horse—Watt rounded and standardized to 1 hp ≈ 33,000 ft‑lbs/min.

    2. How Horsepower Relates to Engine Performance

    Today, horsepower is still a key measure of an engine’s capability. It represents how quickly an engine can perform work, which translates into acceleration, top speed, and towing capacity.

    Horsepower vs. Torque

    While horsepower measures work over time, torque measures twisting force at the crankshaft. Think of torque as the grunt, and horsepower as the ability to sustain that grunt at higher speeds. Both are crucial:

    • Torque: Feels like immediate pull off the line.
    • Horsepower: Keeps you accelerating at higher RPMs.

    3. Measuring Horsepower: SAE vs. DIN vs. Metric

    The way manufacturers report horsepower can differ by region and standard:

    • SAE (USA): Society of Automotive Engineers gross and net ratings; net is more realistic for on‑road performance.
    • DIN (Europe): German standard, similar to SAE net but measured under slightly different conditions.
    • Metric PS: Pferdestärke, where 1 PS ≈ 0.986 hp.

    Always compare like‑for‑like when evaluating car power figures.

    4. Why Horsepower Matters for Drivers

    Understanding horsepower helps you choose a vehicle that meets your needs:

    Acceleration and Passing

    Higher horsepower means faster 0–60 mph times and more confidence when overtaking on highways.

    Towing and Hauling

    If you tow a trailer or carry heavy loads, more horsepower (paired with sufficient torque) keeps your vehicle from straining under weight.

    Fuel Efficiency Trade‑Offs

    Engines tuned for maximum horsepower often consume more fuel. If your priority is mileage, look for a balance between peak power and efficiency.

    5. Tips for Comparing Horsepower in Your Next Car

    • Check the Peak RPM: Horsepower peaks at a specific engine speed—look for a broad powerband for smoother performance.
    • Consider Real‑World Testing: Read road tests and owner reviews to see how claimed horsepower translates on the street.
    • Balance with Torque: Don’t chase peak horsepower alone; ensure torque curves suit your driving style.

    Conclusion

    Horsepower is more than just a number on a spec sheet—it’s a measure of how your engine delivers work over time, affecting acceleration, towing, and even fuel economy. By understanding the horsepower meaning, you’ll be better equipped to evaluate engine performance and choose a car with the right car power for your lifestyle. Next time you compare models, pay attention not only to the peak horsepower figure but also to how and where that power is delivered on the road.