Category: U.S. Driving Tips & Road Safety

  • Avoiding Distracted Driving: Strategies for Focused Driving

    Avoiding Distracted Driving: Strategies for Focused Driving

    Distracted driving remains one of the leading causes of accidents on U.S. roads. By adopting proven distracted driving tips and building safe driving habits, you can significantly reduce your risk behind the wheel. In this article, we’ll explore the most common sources of distraction, practical strategies to avoid phone while driving, and techniques to maintain focus from start to finish.

    1. Understand the Risks of Distracted Driving

    Distractions come in three main categories:

    • Visual: Taking your eyes off the road (e.g., glancing at your phone, adjusting the GPS).
    • Manual: Removing your hands from the steering wheel (e.g., eating, reaching for items).
    • Cognitive: Diverting your mind from driving (e.g., daydreaming, emotional conversations).

    Even a five‑second glance at your phone at 55 mph covers the length of a football field without you looking at the road. Understanding these dangers is the first step in adopting effective distracted driving tips.

    2. Implement a “Phone-Free” Driving Zone

    Out of Reach, Out of Mind

    Place your phone where you can’t easily grab it—such as the glove box, purse in the back seat, or a center console drawer. This simple step removes the temptation to check notifications or send quick replies.

    Use “Do Not Disturb” Modes

    Most smartphones offer a driving mode that silences alerts and sends an auto-reply to incoming texts. Activate this feature before you start the engine to avoid phone while driving distractions completely.

    3. Plan Ahead to Minimize In-Car Distractions

    Preparation prevents many common diversions:

    • Set Navigation & Music: Program your GPS and select your playlist or podcast before pulling out of the driveway.
    • Secure Loose Items: Stow water bottles, snacks, and other items securely so they don’t roll or fall mid‑drive.
    • Adjust Climate Controls: Set temperature, fan speed, and seat positions while parked.

    4. Adopt Mindful Driving Techniques

    Practice the “Eyes Forward” Rule

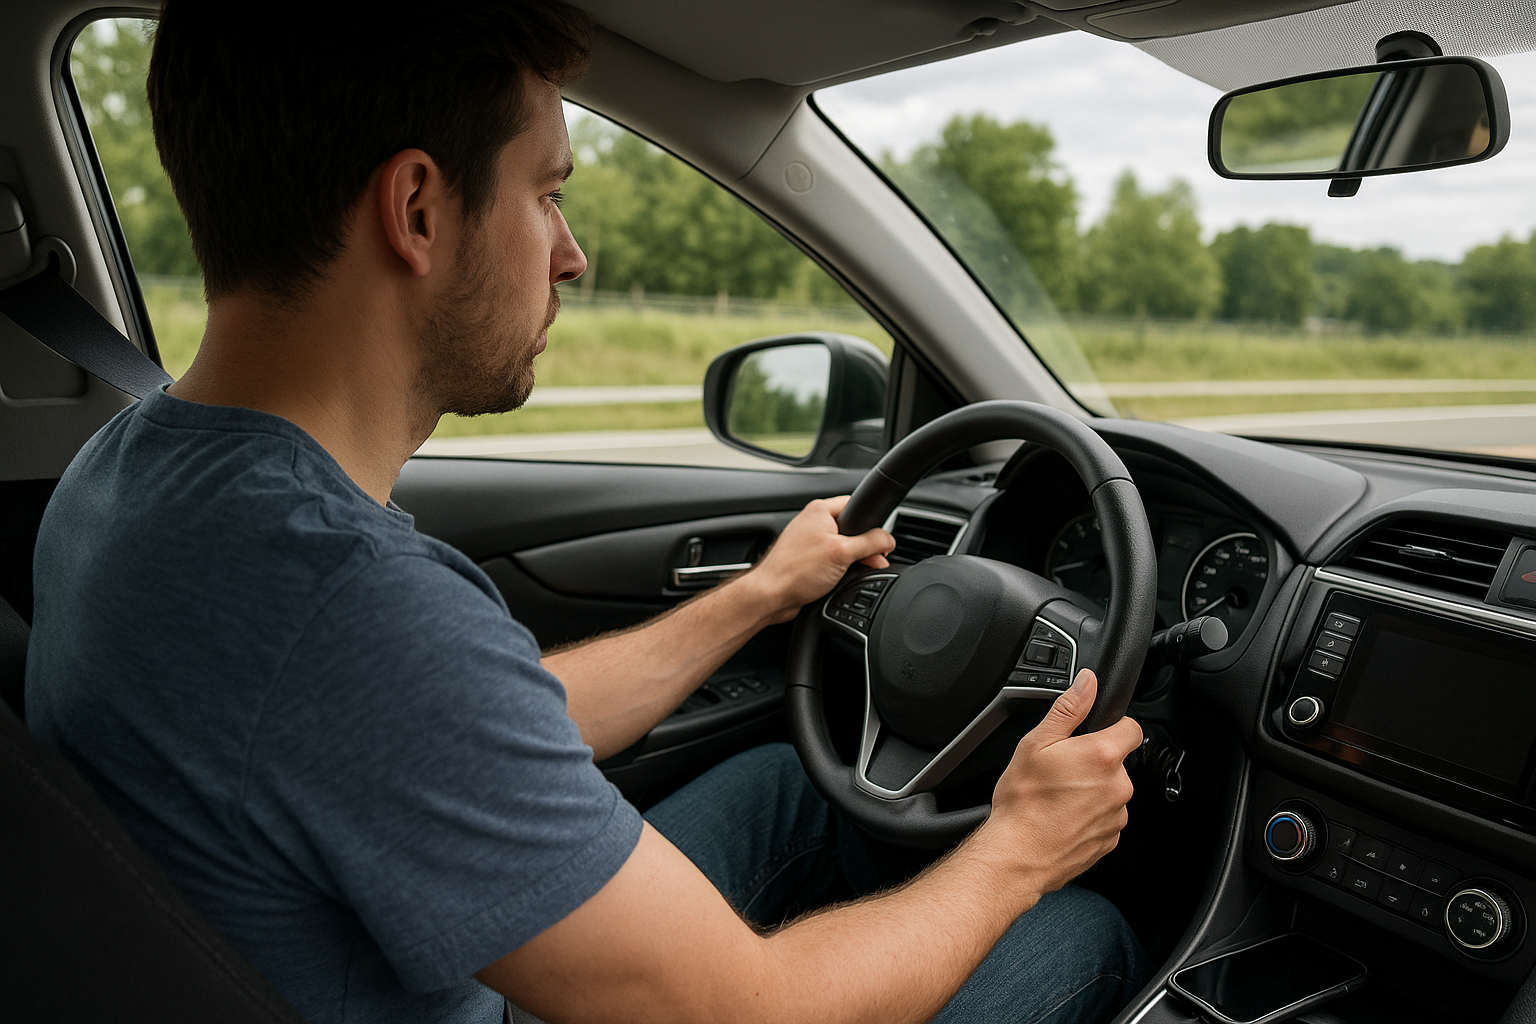
    Keep your focus on the road ahead, scanning lanes, mirrors, and your speedometer frequently. Shifting your gaze every two seconds helps anticipate hazards before they become emergencies.

    Engage in Calm, Focused Driving

    Listen to instrumental music or calm radio stations to reduce cognitive load. Avoid heated conversations or emotionally charged phone calls even if you’re parked—stress carries over into your driving mindset.

    5. Leverage Technology Wisely

    When used correctly, technology can enhance safety:

    • Hands-Free Calling: Pair your phone via Bluetooth and use voice commands to make calls without touching your device.
    • Lane‑Keep & Collision Warnings: Enable driver‑assistance features that alert you to drifting lanes or close obstacles.
    • Dash Mounts: Use a secure phone mount at eye level for navigation—only glance when absolutely necessary.

    6. Cultivate Long-Term Safe Driving Habits

    Consistent practice turns good strategies into automatic behaviors:

    • Review & Reflect: After each drive, note any moments where you felt distracted and plan improvements.
    • Set Personal Rules: Commit to never using your phone for anything other than emergencies while driving.
    • Lead by Example: Encourage family and friends to follow your safe driving habits—peer influence can reinforce positive change.

    Conclusion

    Maintaining focus on the road is essential for everyone’s safety. By following these distracted driving tips, consciously choosing to avoid phone while driving, and embedding safe driving habits into your routine, you’ll protect yourself, your passengers, and other road users. Remember: the moment your full attention shifts away from driving, the likelihood of an accident rises—stay present, stay safe, and make every journey a priority.
  • Preventing and Responding to Car Fires: Safety Measures

    Preventing and Responding to Car Fires: Safety Measures

    Car fires, though relatively rare, can be devastating and dangerous if not prevented or handled correctly. By understanding car fire prevention strategies and following proper vehicle fire safety protocols, you can reduce the risk of fire and react swiftly in an emergency. This guide covers maintenance tips, warning signs, and emergency response steps to keep you and your passengers safe.

    1. Key Causes of Vehicle Fires

    Understanding what typically ignites a car fire is the first step toward prevention:

    • Mechanical Failures: Leaking fuel or oil onto hot engine components.
    • Electrical Shorts: Damaged wiring, faulty alternators, or loose battery connections.
    • Overheating Catalytic Converters: Running rich fuel mixtures can overheat the exhaust system.
    • Aftermarket Modifications: Improperly installed performance upgrades or audio systems.

    2. Car Fire Prevention Tips

    Adopt these car fire prevention measures as part of your routine maintenance:

    2.1 Regular Inspections

    • Check for fuel or oil leaks under the hood and chassis.
    • Inspect hoses and belts for cracks or wear that could lead to fluid spray.
    • Have your cooling system serviced to avoid overheating.

    2.2 Electrical System Care

    • Ensure battery terminals are clean, tight, and free of corrosion.
    • Verify that all aftermarket wiring is routed away from heat sources and secured properly.
    • Replace frayed or exposed wires immediately to prevent shorts.

    2.3 Safe Fuel Handling

    • Avoid carrying extra fuel containers in passenger compartments.
    • Refuel with the engine off and avoid overfilling to minimize spills.
    • Store spare gasoline only in approved, sealed containers outside the passenger area.

    2.4 Mindful Modifications

    • Use professional installers for performance parts and electrical upgrades.
    • Choose components rated for automotive use and appropriate amperage.
    • Verify that exhaust and turbo systems have adequate heat shielding.

    3. Recognizing Warning Signs

    Early detection is critical for vehicle fire safety:

    • Burning Smells: Chemical or rubber odors may indicate overheating or melting insulation.
    • Smoke: White smoke from the engine bay or dark smoke near the exhaust.
    • Warning Lights: Battery, oil pressure, or temperature lights illuminated on the dashboard.
    • Unusual Noises: Hissing (leaks), popping (electrical arcing), or ticking (fluid hitting hot parts).

    4. Emergency Response Steps

    If you suspect your vehicle is on fire, follow these emergency response steps immediately:

    4.1 Pull Over Safely

    1. Activate your hazard lights and slow down gradually.
    2. Pull off the road to a clear, level area away from traffic and structures.
    3. Turn off the engine and engage the parking brake.

    4.2 Evacuate Passengers

    • Instruct everyone to exit the vehicle on the side away from traffic.
    • Move at least 100 feet away and stay upwind to avoid smoke inhalation.
    • Do not attempt to retrieve personal belongings.

    4.3 Call for Help

    • Dial 911 immediately and provide your location, vehicle description, and fire size.
    • Alert highway patrol or emergency services if you are on a major road or highway.

    4.4 Use a Fire Extinguisher (If Safe)

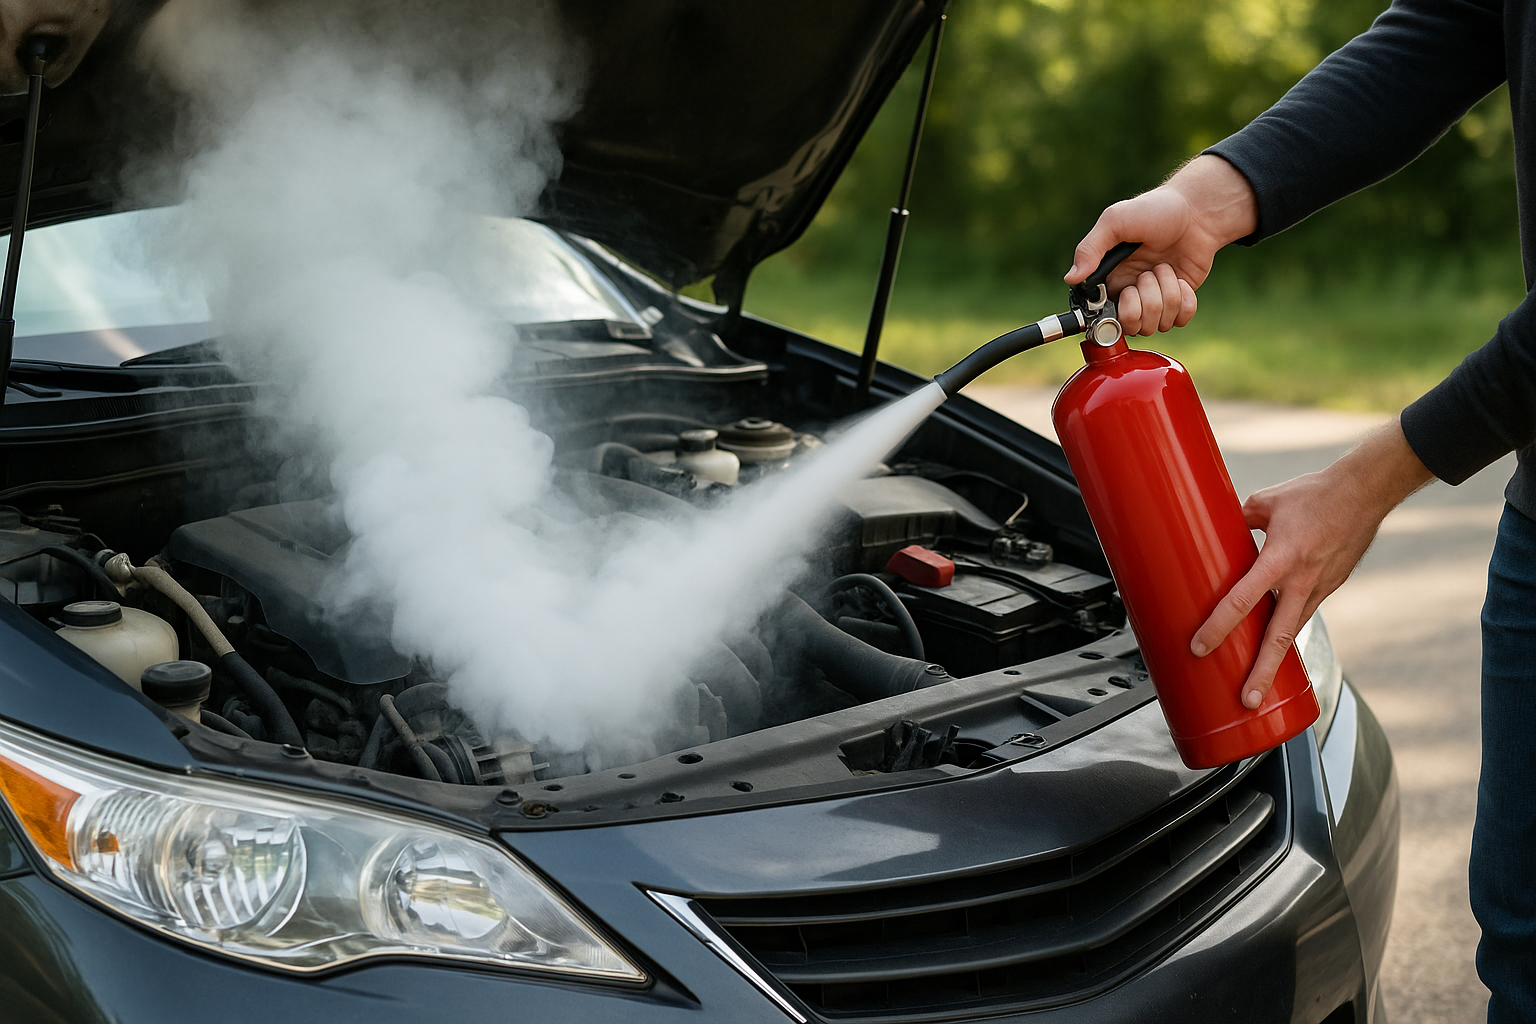
    • Only use a Class B/C (dry chemical) extinguisher rated for flammable liquids and electrical fires.
    • Maintain a safe distance (6–10 feet) and aim at the fire’s base.
    • Discharge in short bursts and back away if the fire intensifies.

    5. After the Incident

    Once the fire is out and professionals have cleared the scene:

    • Have your vehicle towed to a qualified repair facility for a full inspection.
    • Document damage for insurance and replacement purposes.
    • Review what triggered the fire to prevent future incidents.

    Conclusion

    Effective car fire prevention relies on proactive maintenance and awareness of potential hazards. By following these guidelines for vehicle fire safety and knowing the proper emergency response steps, you can protect yourself, your passengers, and your investment from the dangers of automotive fires.

  • How to Safely Change a Flat Tire on the Road

    How to Safely Change a Flat Tire on the Road

    A sudden flat tire can turn a routine drive into a stressful situation. With the right precautions and a clear roadside tire change plan, you can perform a safe and efficient flat tire safety procedure. Follow this step‑by‑step change flat tire guide to get back on the road with confidence.

    1. Prepare Before You Stop

    When you realize you have a flat:

    • Don’t slam on the brakes: Gradually slow down to maintain control.
    • Turn on hazard lights: Alert other drivers that you’re slowing or stopping.
    • Signal your intentions: Use your turn signal to indicate you’re exiting the travel lane.

    2. Move to a Safe Location

    Choose the safest spot possible:

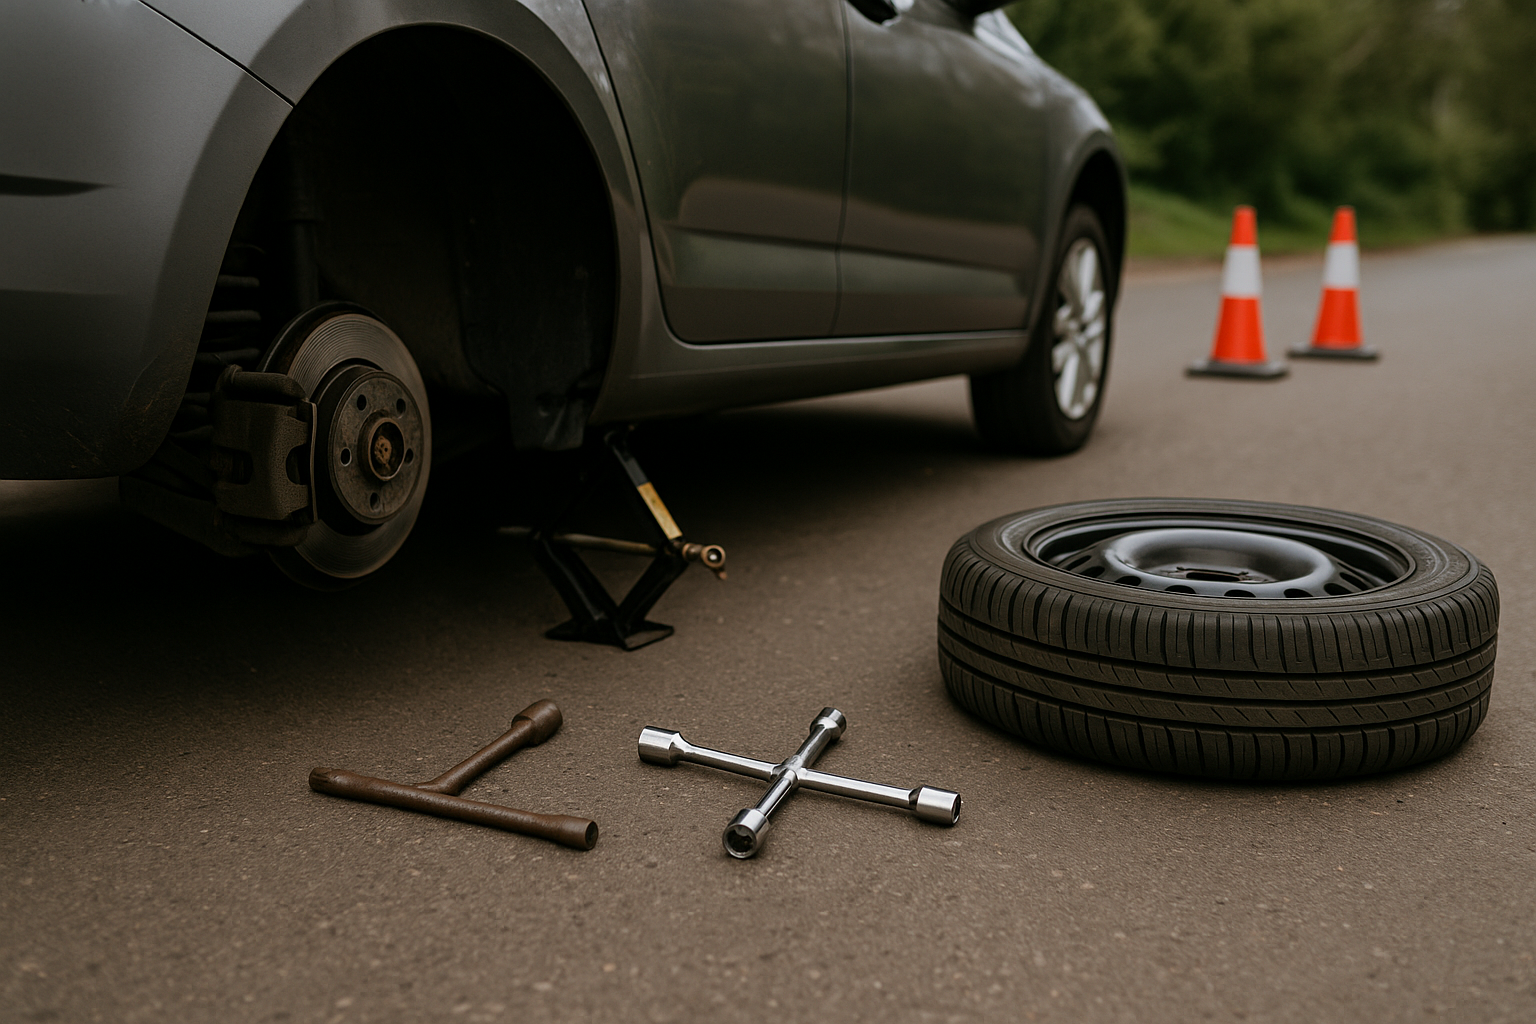
    1. Find level ground: Look for a wide shoulder, parking lot, or side street.
    2. Avoid curves and hills: Other drivers need clear sightlines to see your stopped vehicle.
    3. Engage the parking brake: Prevent your car from rolling once it’s jacked up.

    3. Gather Your Tools & Gear

    Before letting anyone out of the car, assemble what you need:

    • Jack and lug wrench (usually stowed under the trunk floor)
    • Spare tire (check pressure regularly)
    • Wheel wedges or large rocks to block the wheels
    • Reflective vest and warning triangle or cones
    • Flashlight (if it’s dark) and gloves

    4. Secure the Vehicle

    Safety first:

    • Place wheel wedges: Wedge them behind or in front of tires opposite the flat.
    • Loosen lug nuts slightly: Turn the lug wrench counterclockwise while the wheel is on the ground. Do not remove them completely.

    5. Jack Up the Car

    Proper placement and jacking technique are critical:

    • Locate the jack point: Refer to your owner’s manual—typically on the frame behind the flat tire.
    • Raise the vehicle: Pump the jack until the flat tire is about 6 inches off the ground.
    • Ensure stability: The jack should stand straight and firm on level ground.

    6. Remove the Flat & Install the Spare

    Swap quickly but carefully:

    1. Unscrew lug nuts: Remove them entirely and store in a safe spot.
    2. Remove the flat tire: Grip it by the treads and pull it straight off the hub.
    3. Mount the spare: Line up the bolt holes and slide it onto the hub.
    4. Finger‑tighten lug nuts: Replace nuts and tighten by hand to secure the spare.

    7. Lower the Car & Tighten Lug Nuts

    Finalize the installation:

    • Lower the jack: Slowly bring the car back to the ground.
    • Tighten lug nuts: Use the lug wrench in a star pattern to ensure even torque. Tighten firmly.
    • Store tools and flat tire: Place them back in your trunk or storage area.

    8. After the Change: Check & Drive Safely

    Before resuming normal driving:

    • Inspect spare tire pressure: If you have a gauge, confirm it’s at least 30 psi.
    • Stow warning devices: Remove triangles and vests once you’re back in the lane.
    • Drive cautiously: Most spares are temporary “donuts” limited to 50 mph and 50 miles. Head to a repair shop promptly.

    Conclusion

    With these flat tire safety steps, you can confidently handle a roadside tire change and get back on your journey. Regularly check your spare’s condition and practice these steps at home so, in an emergency, you’re prepared to change a flat tire quickly, safely, and effectively.

  • What to Do When Your Car Breaks Down on the Highway

    What to Do When Your Car Breaks Down on the Highway

    A highway breakdown can be stressful and even dangerous if you’re not prepared. This highway breakdown guide will walk you through the essential emergency procedures and roadside safety steps to take—from the moment you notice something is wrong to when help arrives.

    1. Recognize the Signs of Imminent Breakdown

    Pay attention to warning indicators that your car may be about to fail:

    • Warning lights: Check‑engine, oil pressure, or temperature lights illuminated on the dash.
    • Unusual noises: Grinding, screeching, or knocking coming from the engine or wheels.
    • Loss of power or responsiveness: Engine hesitation, stalling, or sudden drop in performance.
    • Fluid leaks: Puddles of oil, coolant, or transmission fluid under the car.

    2. Move to a Safe Location

    When you sense a problem, follow these roadside safety steps:

    1. Signal early: Use your turn signal and hazard lights as you slow down.
    2. Steer to the right: Guide your vehicle toward the shoulder or emergency lane.
    3. Aim for a flat, firm spot: Avoid soft shoulders, steep slopes, or curves where visibility is limited.
    4. Park and secure: Engage the parking brake, put the car in “Park” (or first gear for manuals), and turn off the engine.

    3. Warn Other Drivers

    Make yourself and your vehicle visible:

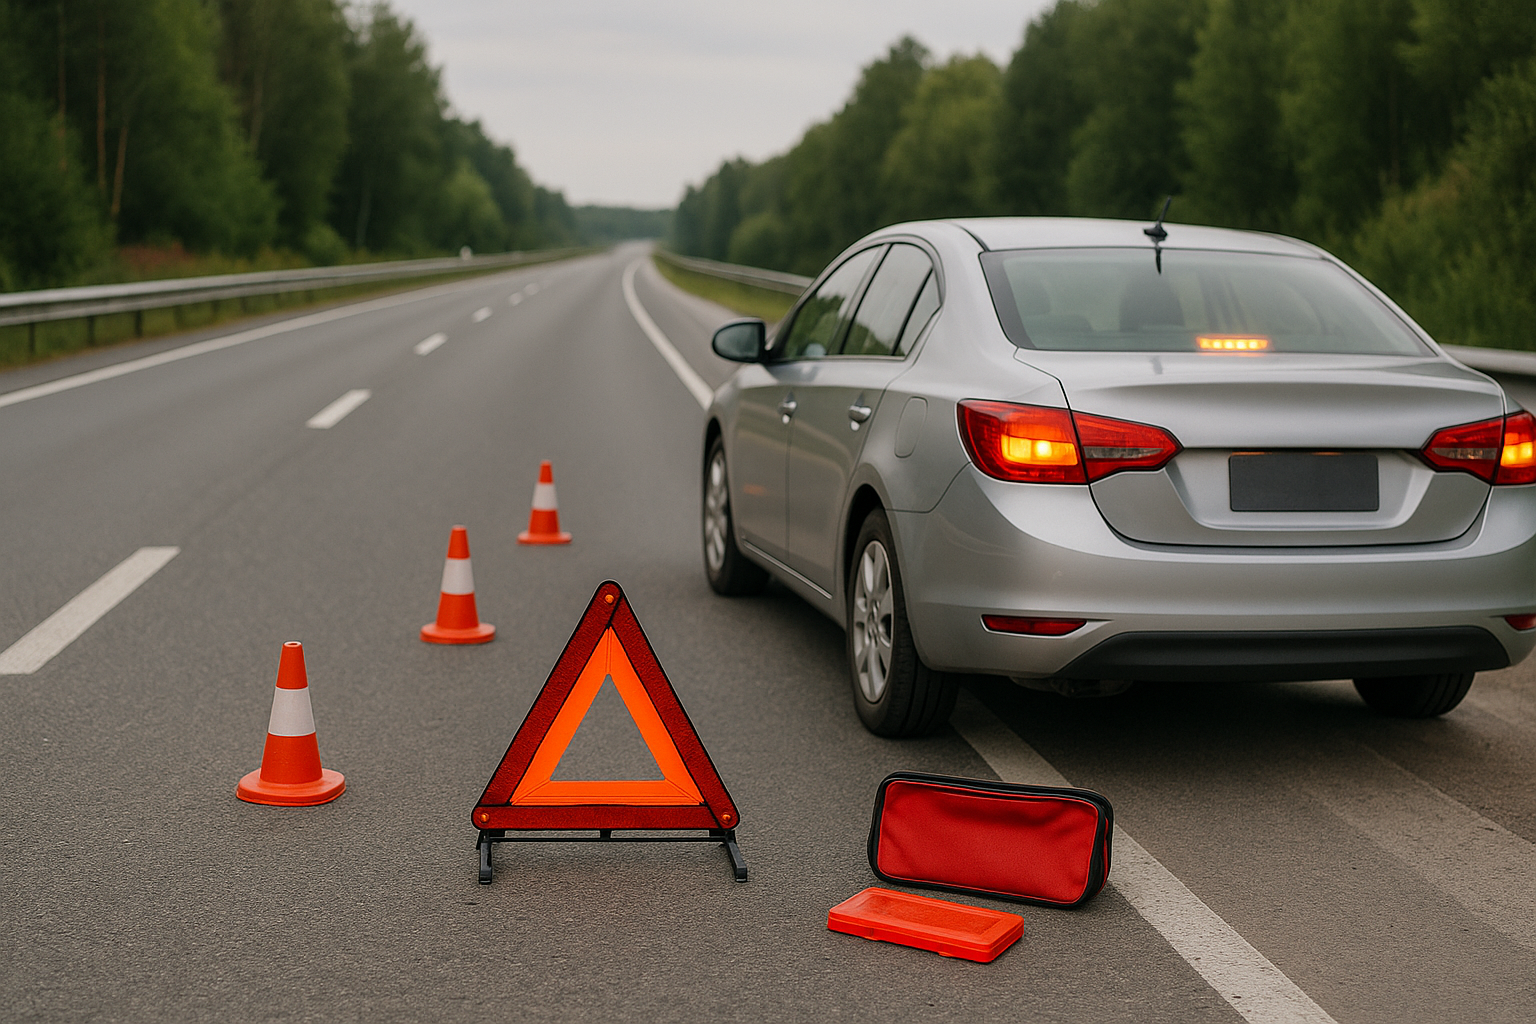
    • Turn on your hazard lights immediately.
    • Place reflective warning triangles or flares at least 10–20 feet behind your car.
    • If you have a high‑visibility vest, put it on before exiting the vehicle.

    4. Stay Safely Away from Traffic

    Once you’ve secured your car:

    • Exit the vehicle on the passenger side to avoid oncoming traffic.
    • Move everyone to a safe spot behind guardrails or a barrier, if available.
    • Keep children and pets close and under control.

    5. Assess the Problem (If Safe to Do So)

    If you’re comfortable and the situation allows, perform a quick check:

    • Look under the hood for obvious issues—loose belts, low fluid levels, or disconnected hoses.
    • Check tire pressure and condition if you suspect a flat or blowout.
    • Listen for fuel pump or starter motor activity when you turn the key to the “On” position.

    If you’re at all unsure, skip this step and move on to calling for help.

    6. Call for Assistance

    Your emergency procedures should include contacting the right help:

    • Roadside assistance service: Use your insurer’s or auto club’s emergency number.
    • Highway patrol or emergency services: Dial 911 for immediate hazards or if someone is injured.
    • Tow truck: Arrange for a tow to a safe repair facility if you can’t restart your car.

    Have your location details ready—mile marker, nearest exit, or GPS coordinates—and describe your vehicle’s make, model, and color.

    7. Wait for Help Safely

    While waiting:

    • Stay well off the road—behind barriers if possible.
    • Avoid standing between your car and traffic.
    • Keep your phone charged and maintain contact with the assistance provider.

    8. Prepare for Future Incidents

    After your breakdown is resolved, consider these preventative measures:

    • Maintain regular service intervals for oil, coolant, brakes, and belts.
    • Carry an emergency kit: flashlight, basic tools, tire repair kit, jumper cables, water, and snacks.
    • Subscribe to a reliable roadside assistance program if you haven’t already.
    • Keep important phone numbers and your insurance card accessible.

    Conclusion

    By following this highway breakdown guide—from identifying warning signs to safe relocation, signaling, and calling for help—you’ll handle roadside emergencies with confidence. Prioritizing roadside safety and clear emergency procedures ensures you and your passengers stay safe until professional assistance arrives.

  • Mastering Roundabouts: Navigating U.S. Intersections with Confidence

    Mastering Roundabouts: Navigating U.S. Intersections with Confidence

    Roundabouts are becoming an increasingly common feature on U.S. roads, praised for improving traffic flow and reducing severe collisions. Yet many drivers feel uncertain when approaching these circular intersections. In this roundabout navigation guide, we’ll cover everything from right‐of‐way rules to lane selection, ensuring your driving roundabouts experience is smooth, safe, and stress‑free.

    1. Why Roundabouts Improve Intersection Safety

    Traditional signalized intersections present multiple conflict points where vehicles cross paths, leading to T‑bone and head‑on crashes. By contrast, modern roundabouts:

    • Reduce conflict points by up to 75% compared to four‑way stops or lights.
    • Force drivers to slow to 15–20 mph, lowering the risk and severity of collisions.
    • Keep traffic moving continuously, cutting idle time and emissions.

    Understanding these benefits will help you embrace intersection safety and approach roundabouts with the right mindset.

    2. Approaching the Roundabout

    Proper roundabout navigation begins well before you enter the circular roadway:

    2.1 Observe the Signs and Road Markings

    • Yield lines: White triangles painted on pavement indicate where to give way.
    • Lane arrows: Overhead or road‑surface arrows show which lanes serve which exits.
    • Advance warning signs: Circular yellow signs and “Roundabout Ahead” posts alert you to slow down.

    2.2 Choose the Correct Lane

    Multi‑lane roundabouts require attention to lane selection:

    • Rightmost lane: Generally for first exits (right turn) or going straight.
    • Left lane: For straight, left turns, or U‑turns—depending on posted signs.
    • Center or middle lanes: May serve multiple exits; follow pavement markings carefully.

    If in doubt, stay in the rightmost lane and use the first exit—this is the safest option for unfamiliar roundabouts.

    3. Entering and Circulating

    Once you’ve positioned correctly, focus on smooth entry and continuous flow:

    3.1 Yield to Traffic in the Circle

    Always yield to vehicles already in the roundabout. Wait for a safe gap—there is no signal, so this driving roundabouts step is crucial for preventing collisions.

    3.2 Maintain a Steady Speed

    • Aim for 15–20 mph unless posted otherwise.
    • Avoid sudden acceleration or braking inside the circle.
    • Keep an eye on other vehicles—especially larger trucks that require extra space.

    3.3 Stay in Your Lane

    Do not change lanes within the roundabout. If you miss your exit, continue around again—never cut across lanes.

    4. Exiting the Roundabout

    Safe exits depend on clear signaling and lane discipline:

    4.1 Signal Early

    Once past the exit before yours, use your right turn signal to indicate you will be leaving the circle. This alerts drivers behind you and those in adjacent lanes.

    4.2 Watch for Pedestrians and Bicyclists

    Crosswalks often sit just beyond the exit. Reduce speed and yield to any pedestrians or cyclists crossing your path.

    4.3 Merge Smoothly

    Check your mirrors and blind spots before merging onto the exit road. Avoid drifting wide or swinging back, as this could catch other drivers off guard.

    5. Special Situations and Tips

    5.1 Emergency Vehicles

    If you hear sirens, do not stop in the circle. Continue to your exit, then pull over safely to let emergency responders through.

    5.2 Large Vehicles

    Buses and trucks may use the truck apron (raised pavement) in the center. Give them extra space and avoid following too closely.

    5.3 Winter Conditions

    On icy roads, approach slowly and yield generously—icy surfaces can extend stopping distances dramatically. Use gentle inputs to maintain control.

    Conclusion

    By mastering these roundabout navigation strategies—observing signs, choosing the right lane, yielding properly, and signaling clearly—you’ll navigate U.S. roundabouts with confidence and uphold intersection safety. Remember: slow down, stay alert, and respect the flow of traffic. With practice, roundabouts will feel like a natural, efficient way to keep your journeys moving smoothly.

  • Safe Driving in Snow & Ice: Essential Tips for U.S. Roads

    Safe Driving in Snow & Ice: Essential Tips for U.S. Roads

    Winter weather can transform familiar roads into slippery traps. Following these snow driving tips and prioritizing ice road safety will help you navigate snowy highways and icy side streets with confidence. This winter driving guide covers vehicle preparation, safe speed and following distances, and emergency procedures to keep you and your passengers out of harm’s way.

    1. Prepare Your Vehicle

    Inspect Tires & Adjust Pressure

    • Check tread depth: Aim for at least 6/32″ on winter tires.
    • Consider winter tires or all‑season tires rated for snow.
    • Lower tire pressure by 2–3 psi in cold weather (per manufacturer recommendations).

    Top Off & Protect Fluids

    • Use windshield washer fluid rated for sub‑zero temperatures.
    • Ensure antifreeze/coolant is at the proper 50/50 mix to prevent freezing.
    • Keep your gas tank at least half full to reduce fuel line freeze risk.

    Emergency Kit Essentials

    • Blankets, warm clothing, and hand warmers
    • Ice scraper and small snow shovel
    • Traction aids: sand, kitty litter, or traction mats
    • Flashlight, extra batteries, and reflective warning triangles
    • Non‑perishable snacks and bottled water

    2. Adjust Your Driving Behavior

    Reduce Speed and Increase Following Distance

    On snow or ice, reduce your normal speed by at least one third. Maintain a minimum three‑second following distance—and extend to six seconds or more when roads are coated or visibility is low. This gives you extra time to brake and maneuver.

    Smooth Inputs: Brake, Steer & Accelerate Gradually

    Abrupt movements can break traction. Apply brakes gently, steer with smooth, deliberate inputs, and accelerate slowly to avoid wheel spin. If your vehicle has antilock brakes (ABS), apply firm, continuous pressure; ABS will pulse the brakes to prevent lockup.

    Understand Your Drivetrain

    • Front‑Wheel Drive (FWD): Good for traction when climbing hills; still requires caution when turning.
    • Rear‑Wheel Drive (RWD): Can oversteer in low traction—counter‑steer into skids to regain control.
    • All‑Wheel/4‑Wheel Drive (AWD/4WD): Improves traction but does not reduce stopping distances; drive as if in FWD/RWD conditions.

    3. Navigating Specific Hazards

    Ice Patches & Black Ice

    Black ice is nearly invisible and most common on bridges, overpasses, and shaded areas. When approaching these zones, ease off the throttle and avoid braking—keep steering straight and let the vehicle coast until you regain traction.

    Snow‑Covered Roads

    • Stay in established tire tracks where snow is already compacted.
    • Use lower gears (1st or 2nd) for better control when descending hills.
    • Avoid cruise control—manually modulate throttle and brakes.

    Deep Snow & Slush

    Drive slowly through deep snow to avoid plowing under the vehicle. If you get stuck, rock the vehicle by gently shifting between drive and reverse, while lightly pressing the accelerator. Use traction aids under the drive wheels to regain grip.

    4. Emergency Procedures

    If You Begin to Skid

    1. Remain calm and ease off the gas.
    2. Steer gently in the direction of the skid (“steer into it”).
    3. Once traction returns, straighten the wheels.

    If You’re Stuck or Stranded

    • Stay with your vehicle: it provides shelter and is easier for rescuers to locate.
    • Run the engine sparingly to stay warm—clear exhaust pipe of snow to prevent carbon monoxide buildup.
    • Display warning triangles or a brightly colored cloth to attract attention.

    5. Plan Ahead & Stay Informed

    Before every winter trip, check weather forecasts and road‑condition reports via your state DOT or AAA’s traffic map. Allow extra travel time, inform someone of your route, and consider postponing travel when storms are severe.

    Conclusion

    This winter driving guide of snow driving tips and ice road safety practices can mean the difference between a safe journey and a roadside emergency. By preparing your vehicle, adjusting your driving style, and knowing how to react to winter hazards, you’ll enhance your safety and confidence on U.S. roads all season long.